¶ Action Sequences
In PolypopLive an Action Sequence is a way to organize a series of actions to fire simultaneously or one after the other.
When creating an alert or a hotkey, an Action Sequence will help you organize the order of the action, and if needed, place a pause between them.
If you want to create a hotkey or an alert that triggers more than one action, we highly recommend using an Action Sequence. This will not only help you keep track of what you’re doing, but it will also make your UI cleaner and easier to navigate.
¶ First, you will need to add a Source Alert
Let’s create a source with an alert. In this case, we’ll create a simple Hotkey.
-
Open the Library by clicking the “Open Library” button on the lower left side of the screen.
-
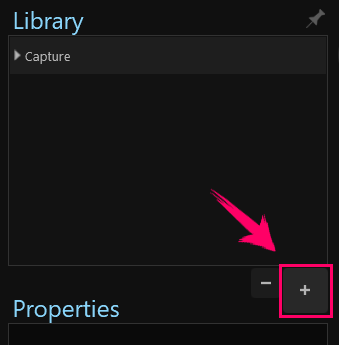
Click the + button on the bottom right of the Library panel.
-
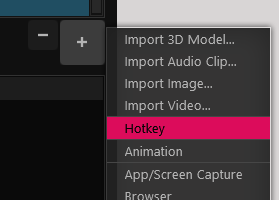
Next, from the menu that appears, click the Hotkey item.
-
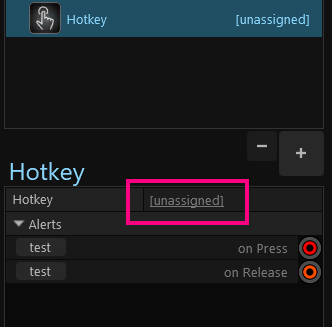
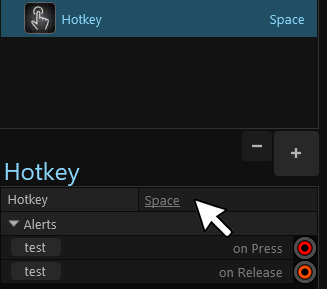
Next, from the Hotkey’s properties at the bottom of the Library panel, click the “[Unassigned]” item to the right of the “Hotkey” property.
-
Finally, press the Spacebar on your keyboard to assign it as the hotkey.
¶ Adding an Actionable Object
Next, let’s create an object with an action we’ll trigger when a set amount of time elapses after we press our hotkey.
-
From the Scene Layout panel, click the + button. The prefab browser should now open.
-
On the categories list, select the “3D Objects” category.
-
Select any object from the list of objects that appears.
-
At the bottom of the window, click “Add As” and choose the 3D Object Emitter option.
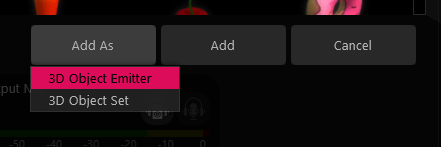
A 3D object emitter will be added to your Scene Layout panel.
¶ Creating the Action Sequence
Finally, let’s create the action sequence that will run whenever we press our hotkey.
-
Ensure the Hotkey source is selected from the Source Library.
-
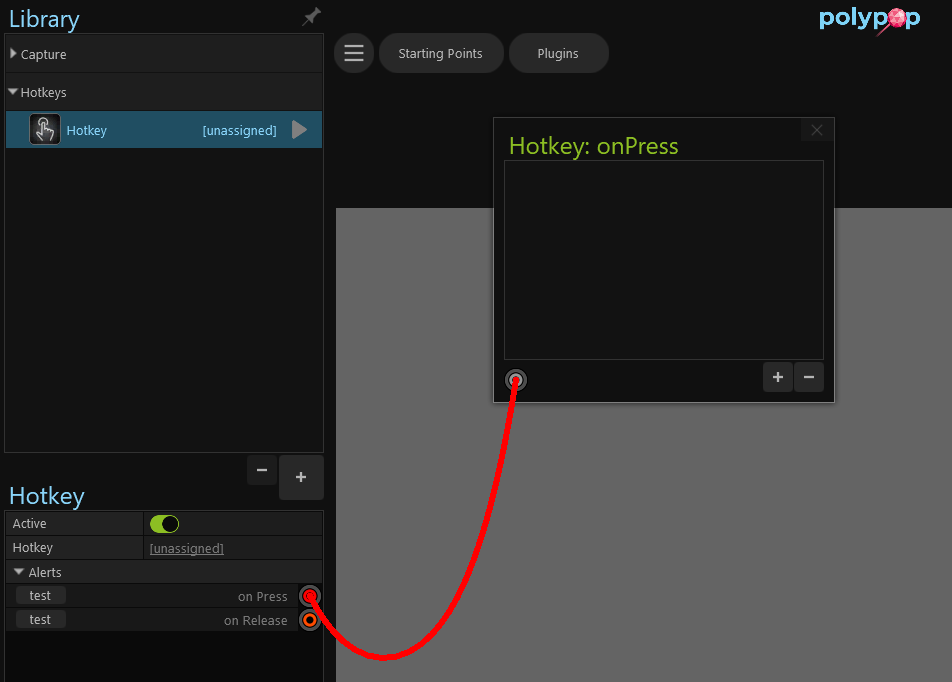
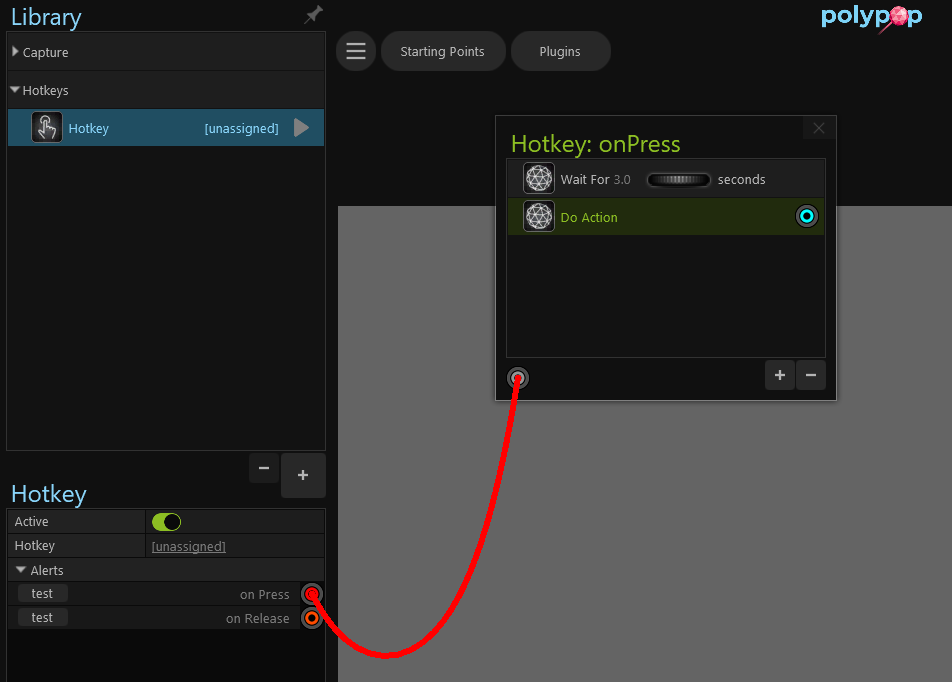
Now, click and drag your mouse from the “onPress” alert socket to pull out a wire.
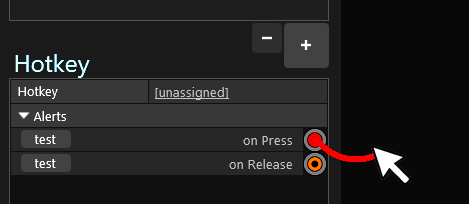
-
Next, attach the wire to the Action Sequence socket that should now be visible on the top center of the user interface.
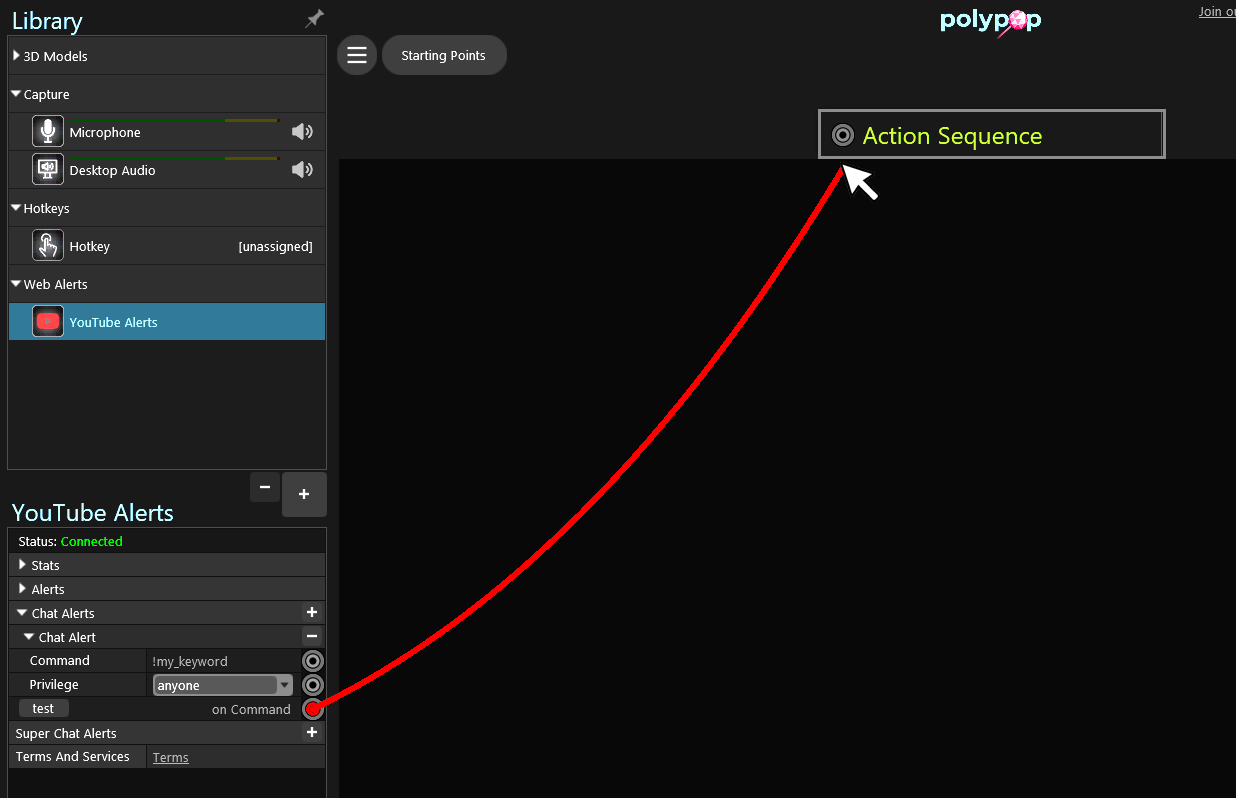
The Action Sequence panel should now fully expand. This panel allows us to add steps that execute in order from top to bottom when our connected alert fires. Let’s add a couple of steps.
The Action Sequence’s name will change to the source’s name (in the example “Hotkey”), followed with the alert name (“onPress”)
To rename an Action Sequence, simply double click its title and type in a new name.
-
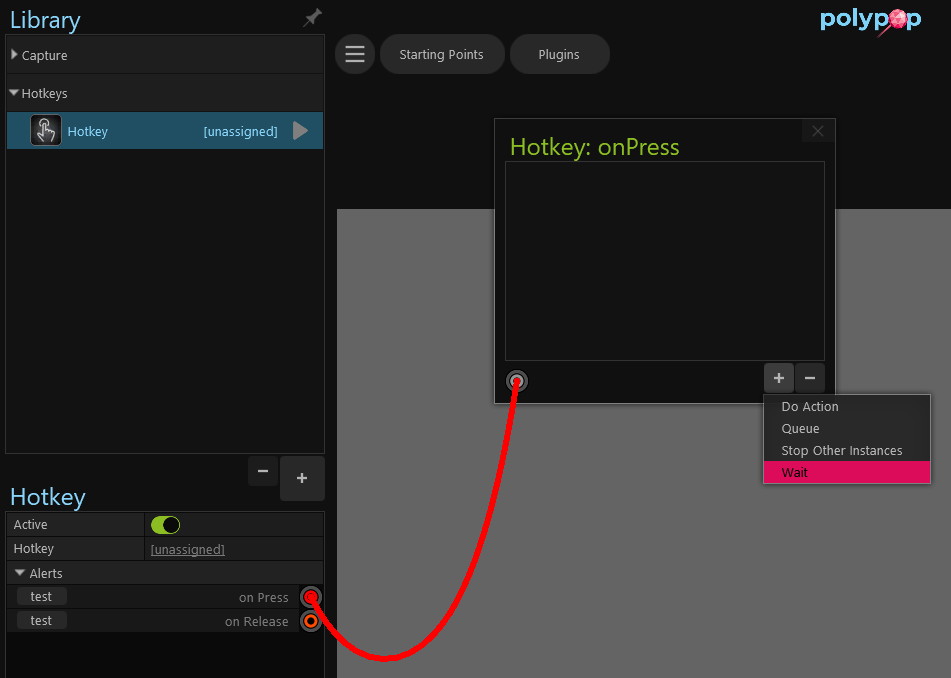
On the Action Sequence panel, click the + button.
-
From the menu that appears, click the “Wait” item.
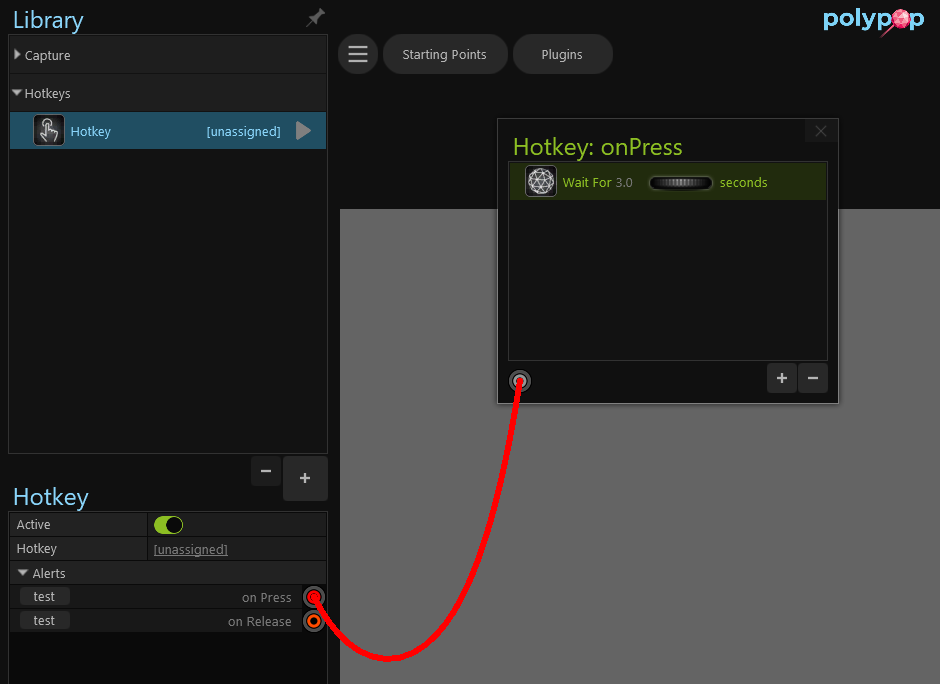
-
The Wait step should now appear on the list. Adjust its wait time to 3 seconds by clicking and dragging on its roller.
-
Next, let’s add another step. From the Action Sequence panel, click the + button.
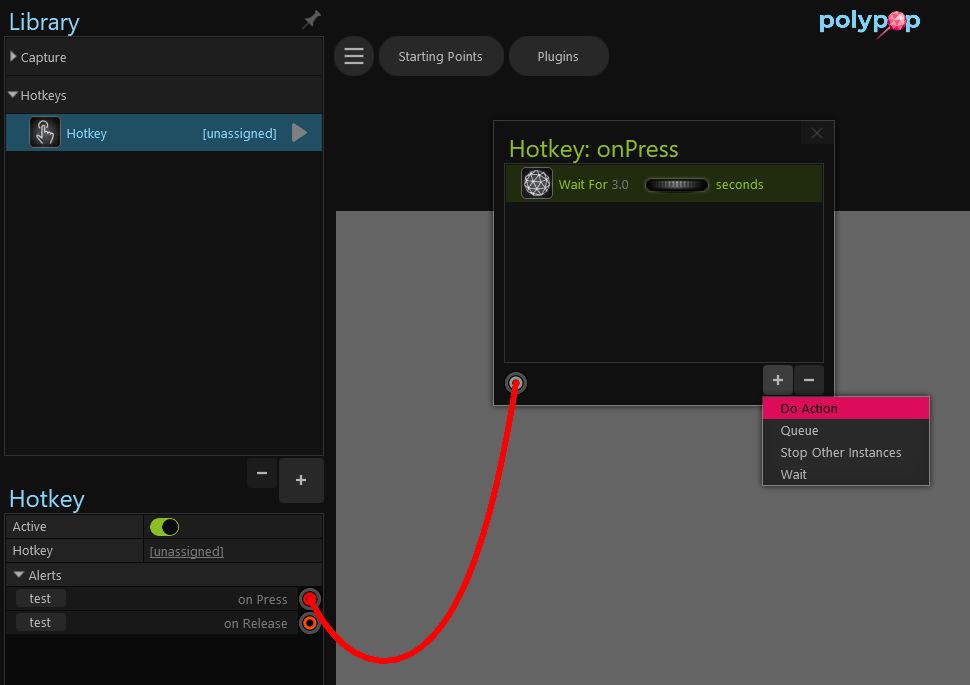
-
From the menu that appears, click the “Do Action” item. The “Do Action” step will add an action to the sequence that will emit its alert when the action sequence reaches it, which in this case will occur after the time we set in the preceding Wait step.
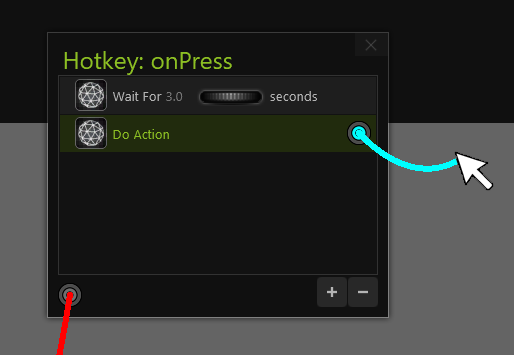
Let’s now connect the “Do Action” to the 3D Object Emitter’s “Emit Burst” action.
-
Ensure the 3D Object Emitter is selected from the Scene Layout list.
-
Click and drag your mouse from the “Do Alert” socket on the Action Sequence panel and connect the wire to the 3D Object Emitter’s “Emit Burst” action socket.
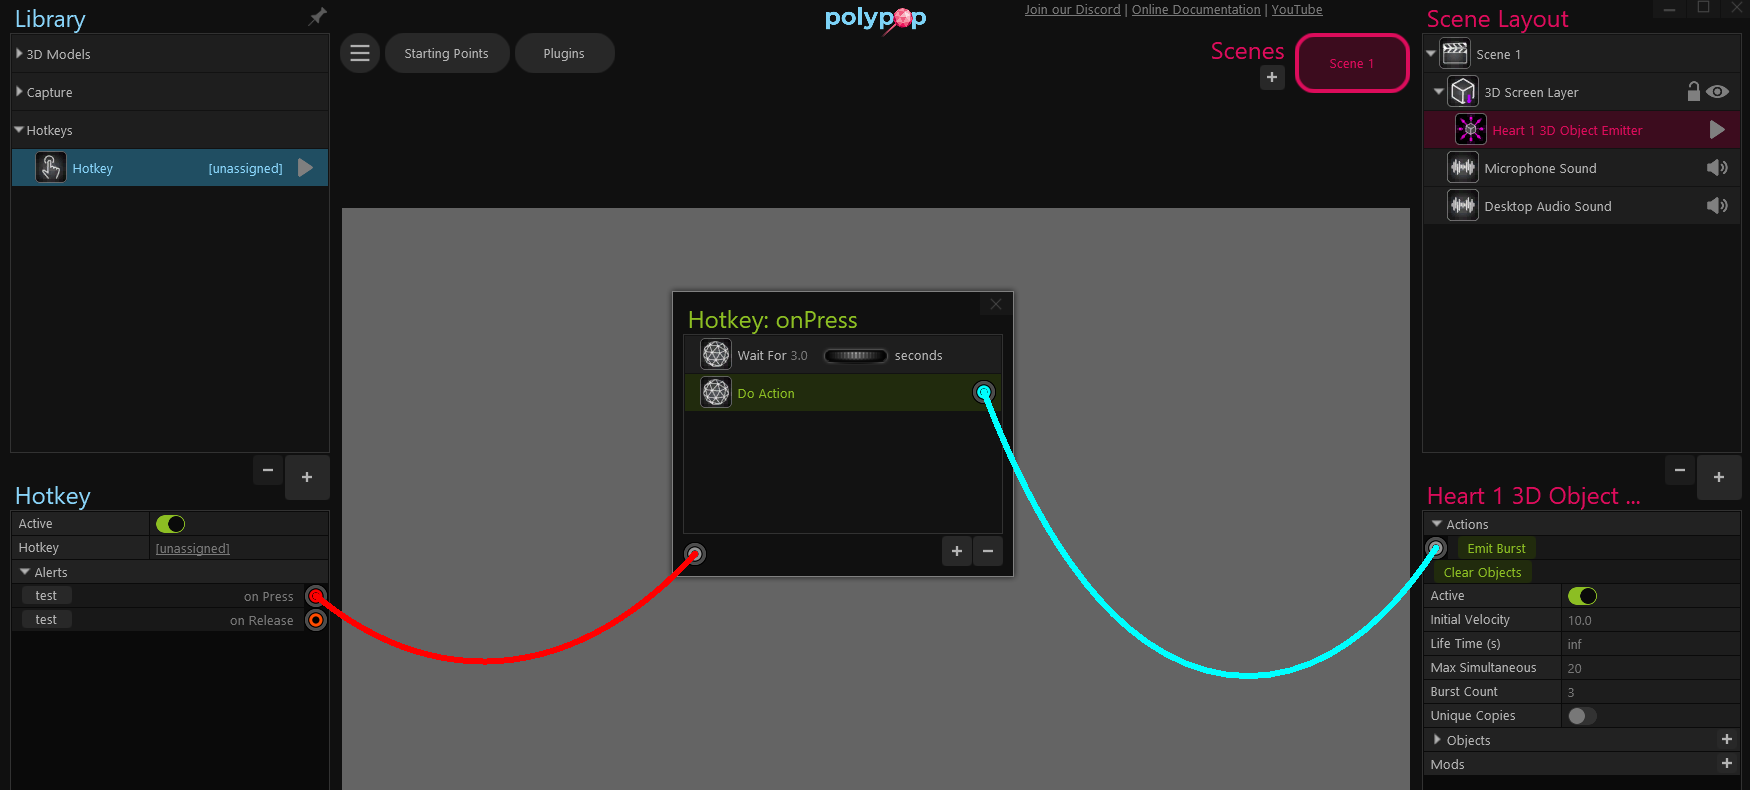
With this connection established, we can now easily visualize the flow from the hotkey “onPress” alert to the Action Sequence, and from there to the object emitter’s “Emit Burst” action.
Now let’s see what happens when we press our Hotkey.
- Press Spacebar
The Action Sequence will now run in response to the “onPress” action that triggers when we press Spacebar. The sequence will wait 3 seconds and then emit an alert that will, in turn, emit a burst of objects from our 3D Object Emitter.
You can close the Action Sequence panel via the “X” button at the top right of the panel when you are done editing its steps. You can re-access it by hovering your mouse over the hotkey’s “onPress” socket and clicking the Action Sequence link that appears.
Giving your alert layers descriptive names in the Action Sequence window can help keep your workflow organized and make it easier to make adjustments later on. Properly naming your alert layers can also improve the overall clarity and readability of your Action Sequence, which can be especially helpful when working on large or complex projects.
¶ Alerts Queue
You can add a Queue action to your sequence. This addition enables you to specify a time interval for Polypop to wait before executing the following actions in the sequence in case the alert was triggered again.
In circumstances where the alert you created may be triggered multiple times, incorporating a Queue can prove to be beneficial. It allows ample time for the animation to finish before the second alert in the queue initiates.
To incorporate a Queue into your Action Sequence, you simply need to click on the “+” button within the Action Sequence window, and select the “Queue” item from the ensuing menu.
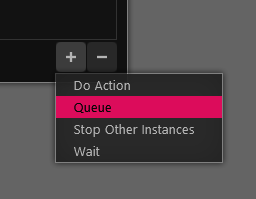
When adding a queue to your sequence it is recommended not to also add the " Stop other instances" item, because doing so will clear any queue(s) that are present in the action sequence.