¶ Adding your Webcam
In this article, we'll learn how to add your webcam (or an external camera connected to your computer) to your Poplypp project. Once your camera is connected, you can add its feed to your project as a 2D layer or use it as a texture in various 3D objects.
¶ Connecting your webcam
- Open the Library panel by clicking on the Open Library button on the lower left of the screen.
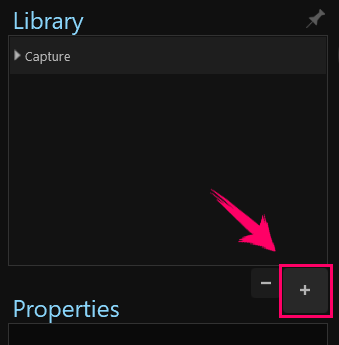
- Click the + button located on the lower right side of the Library panel.
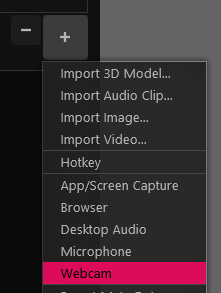
- Select Web Cam from the menu.
The Library Panel
Your Library panel is where all of your project's assets are stored. It is located on the left side of your screen.
A new Webcam will be added to your Source Library under the Capture menu.
¶ Camera Properties
Once the Webcam item is selected in the Source Library Your Camera's properties will appear on the lower part of the Library panel.
¶ Device
Under Device, you can see the name of the camera you are connected to. If you have more than one camera connected to your computer, you can choose the one you'd like to use.
¶ Format
Under Format, you can see the available data formats your camera supports and choose between them.
If your webcam seems to be laggy, play with formats until a smooth one is found (though the default should generally be best).
¶ Resolution
Under Resolution, you can see the resolution values your camera supports, and choose between them.
¶ FPS (frames per second)
Under FPS you can see the number of FPS your camera supports and choose between them.
Configure Under Configure you can have quick access to your camera configuration data - and can tweak and change it to your liking.
¶ Flip Vertically
Here you can choose the vertical direction of your camera feed. This can be handy when your camera is tilted to show your keyboard.
¶ Adding your camera feed to your canvas
-
In your Library Panel, ensure the capture list item is expanded (click the small triangle to the left of the list item to expand).
-
Once the Webcam item is selected, you can drag the Webcam feed to your scene/canvas either from the list items menu or from the camera feed rectangle that appears in the Webcam properties, on the lower left side of the screen.
Once your camera feed is added to the canvas:
- You can resize it and move it around inside the canvas.
- A 2D Webcam layer is automatically added to the top of your Scene Layout panel (the upper right panel).
- You can drag your webcam to your canvas multiple times to create interesting designs.
- You can crop the webcam source in the “Crop and Filter” mode. To learn more, please read the Crop and Filter article.
¶ Applying your live webcam feed as a texture to 3D objects
To learn how to apply your webcam feed as a texture to a 3D object refer to the Change the Texture of a 3D object article.
¶ Adding a Capture Card Source
In PolypopLive, the "Webcam" source captures video from a device, whether it's a physical hardware device or a virtual one. To add a capture card as a source, you'll need to add a Webcam source to your Library panel and then select your capture card in the webcam's "Device" layer properties.