¶ Blend Modes
Blend modes allow you to control how the colors of one layer blend with the colors of the layers below it. Blending a video, image, or 3D layer on top of other layers can help you create a wide range of creative looks.
Applying a Blend Mode to a video or a gif animation can give your livestream a unique look
In Polypoplive Blend Mod can be applied only to grouped layers.
Grouping layers together allows you to organize the layers in your scene layout panel. This can be useful for keeping your scene organized and easy to navigate, especially if you have a large number of layers, but in this example, we will group layers in order to change their blend mode.
¶ Grouping layers
-
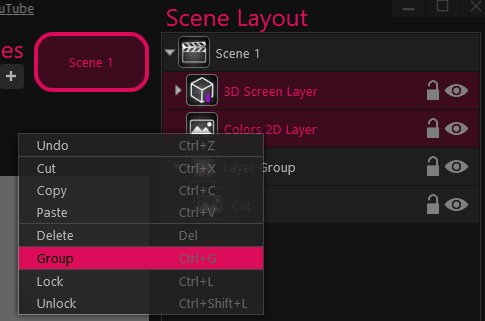
Select the layers you want to group together in the Scene Layout panel.
-
Right-click on the selected layers and choose the Group option from the dropdown menu.
You can also group layers by pressing CTRL+G
-
We now have a new Grouped layer in our Scene Layout pane.
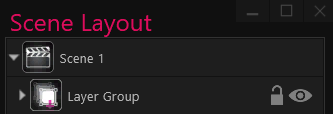
Clicking on the triangle next to the Layer Group icon will show us all the grouped layers.

In this example, we can see that the Layer Group together two layers: a 3D layer and a 2D image layer.
By grouping a single layer to itself - you can change the blend mode of only one layer.
¶ Applying a Blend Mode to a layer group
-
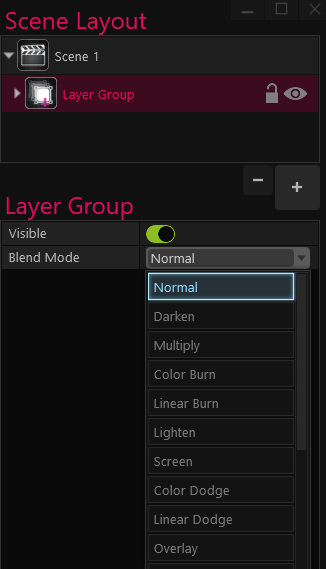
Select the Layer Group in the Scene Layout panel.
-
In the Layer Group properties - click on the Blend Mode menu and select an option from the dropdown menu.
Colored Blend Modes are not supported when the group contains an image filter.
¶ Blend Mode options
There are 17 different blend modes you can choose from.
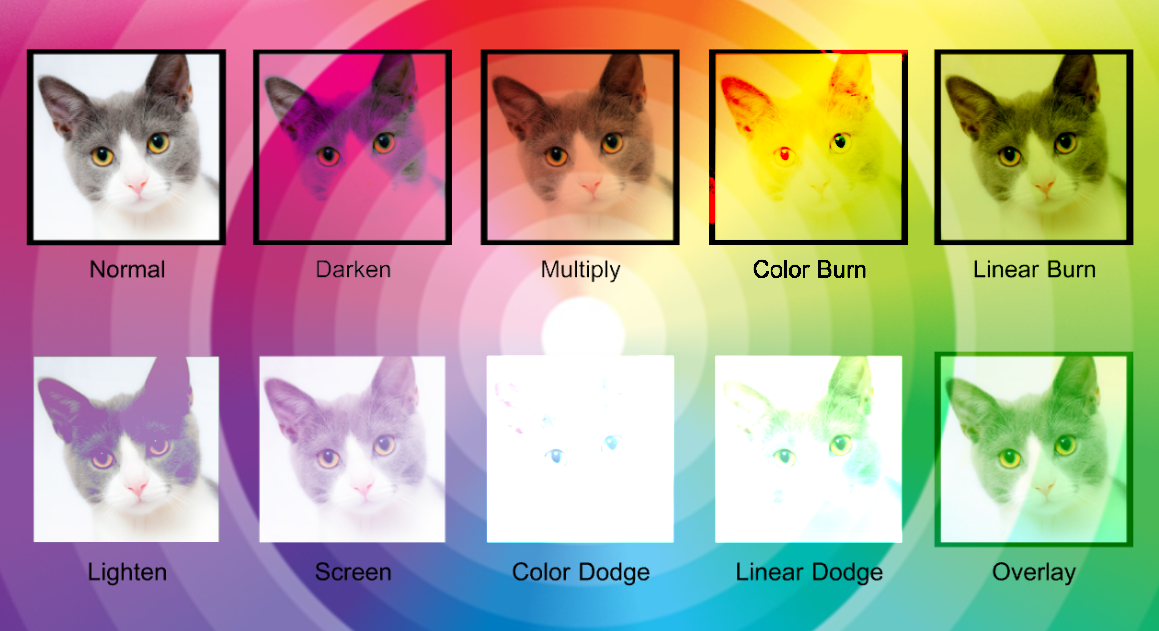
Each blending mode blends the pixels of the cat layer with the pixels of the layer below it differently
- Normal
- Darken
- Multiply
- Color Burn
- Linear Burn
- Lighten
- Screen
- Color Dodge
- Linear Dodge
- Overlay
- Soft light
- Hard Light
- Vivid Light
- Linear Light
- Pin Light
- Difference
- Exclusion