¶ Expression Wire plugin
This plugin adds a new wire to connect alerts to any property type and assign values using simple expressions. For instance, you can connect an alert that contains a numerical value directly to a numerical property to set the number based on the alert value. In addition, you can perform math computations on those values and assign values based on boolean conditions.
¶ Installing the Expression Wire plugin
¶ Switching PolypopLive to Developer Mode
To be able to use the Expression Wire, you will need to switch to developer mode. This special mode allows you to access advanced features and make customizations that may not be available in the standard user mode.
-
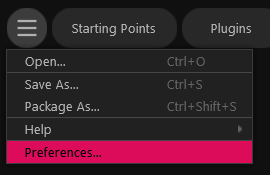
Click on the app menu icon at the top-left of the user interface.

-
Choose the Preferences option from the menu that appears.
-
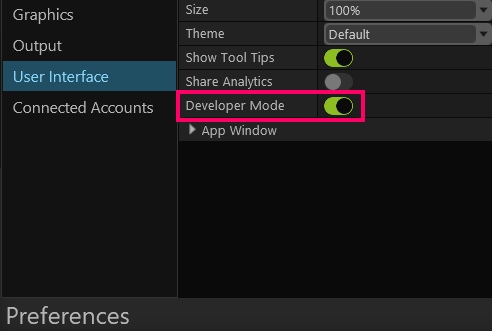
Select the User Interface category then enable the Developer Mode option.
¶ Installing the Expression Wire plugin
Plugins allow users to customize PolypopLive to their specific needs by installing only the features they require.
-
Click on the Plugins button located at the top of the UI.

-
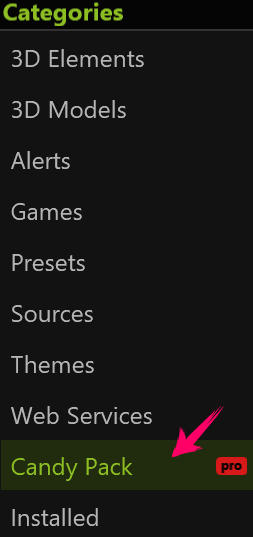
Select the “Candy Pack” category from the menu.
-
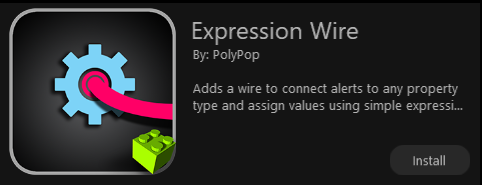
Click the "Install" button next to Expression Wire plugin.
-
You can now use the Expression wire and its features in your projects.
If the plugin is already installed it means you already have it. You do not need to install it again.
¶ Using the Expression Wire
Now that the plugin is installed, we can use the Expression Wire in a variety of ways. Let’s examine a few cases. We’ll be using the QR Code plugin for these examples, so please install it now if you haven’t already done so.
¶ Example 1: Setting a numeric property from an alert value
Let’s add a QR Code Alert to the Library.
-
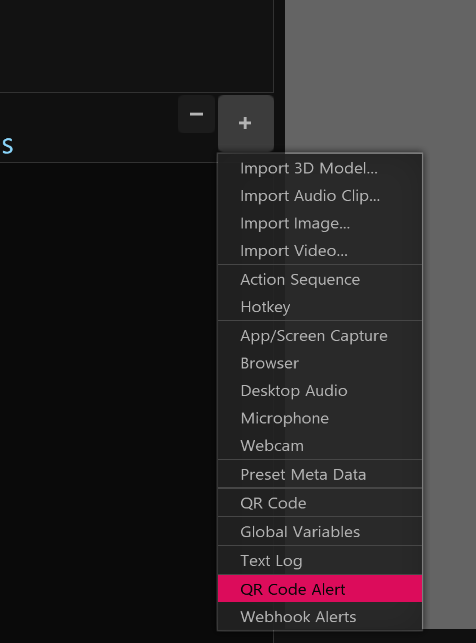
On the Library panel, click the “+” button. You may need to open the Library by clicking the “Open Library” button if the library is not currently open. You may want to pin the Library to keep it open to make things easier.
-
Select “QR Code Alert” from the menu that appears.
Looking at the QR Code Alert’s properties, the “on Alert” alert will fire whenever we (or a viewer) scans the QR code. The alert’s wire data contains a <hits> field that is set to the number of times the code was scanned. Let’s use this value to increase the size of something on screen as the hit count grows.
-
On the Scene Layout panel, click the “+” button.
-
On the list at the left, select the “3D Objects” category. Select any 3D object and add it to the scene.
Now let’s connect the QR Code Alert’s “onAlert” to the Transform/Scale property of the 3D object we added.
-
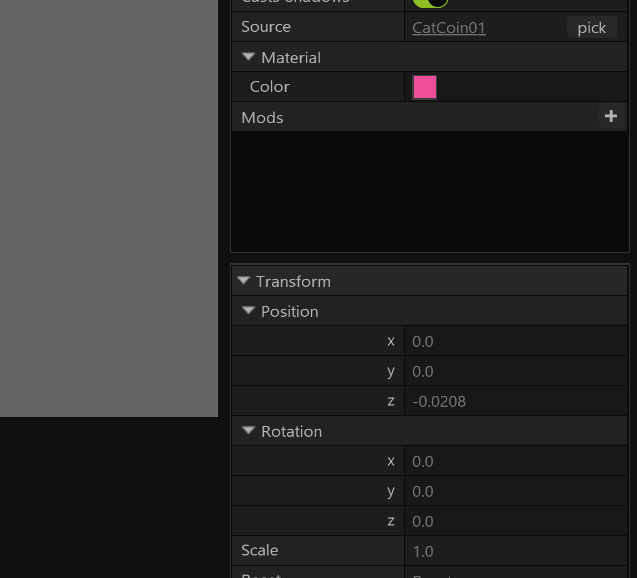
Ensure the 3D object is selected and ensure the Transform properties are expanded at the bottom right of the screen.
-
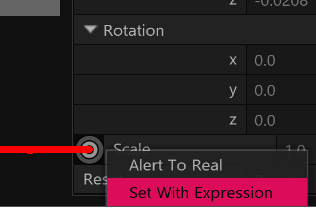
Now left-click and hold on the red socket next to “on Alert” and drag your mouse to connect a wire to the flashing white socket next to the “Scale” transform property.

-
From the menu that appears, select the “Set With Expression” item.
-
A panel displaying the Expression Wire’s properties should popup.
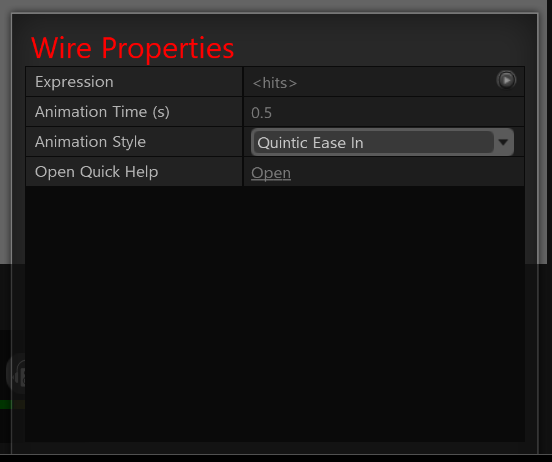
The Expression property lets you set an expression that, after it's evaluated, determines the final value to use for the target property. In our example, it is pre-initialized to the single field in our source alert data, namely:
<hits>
This simply means set the <hits> count as the final Scale value. If you scan the QR Code a few times, you should see the object growing as the Scale is set directly to the hit count. The first time it will be 1, then 2, etc.
We can modify the Expression using math functions to change its behavior. For instance, if we set the Expression to:
<hits> * 0.5
it will grow half as fast. If you set it to:
<hits> * <hits>
it will grow exponentially.
The Animation Time and Animation Style properties control how the current property value animates to the final evaluated value. If you set the Animation Time to 0, the value will be set instantaneously.
¶ Example 2: Incrementing The Target Value
Another useful trick with expressions is modifying (as opposed to setting) the target value. For instance, we could have an alert increment a value each time it fires. Let’s set up a simple case to see how that works.
-
On the Library panel, click the “+” button.
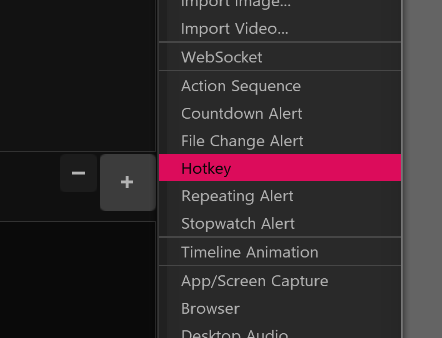
-
Select “Hotkey” from the menu.
-
Next, on the Hotkey properties. click “[Unassigned]” and press the 1 key on your keyboard to set the hotkey.
Now let’s add an element to the scene.
-
On the Scene Layout panel, click the “+” button.
-
Select the “3D Objects” category.
-
Select any object then click the “Add As” button on the bottom of the screen.
-
From the menu, select “3D Object Set”. Our selected object is added as a set to our scene.
-
Finally, set the 3D Object Set’s “Column” property to 1.
A set comprising of a single object should now be on your scene. Let’s make it so whenever we press our hotkey, it adds an element to our set. Let’s create our Expression Wire:
-
On the Hotkey’s properties, left-click and hold on the red socket next to the “on Press” and drag your mouse to connect a wire to the flashing white socket next to the 3D Object Set’s “Columns” property.
-
Select “Set With Expression” from the menu that appears.
-
A panel displaying the Expression Wire’s properties should popup.
-
For the Expression property, type:
<target> + 1 -
Finally, set the Animation Time to 0.
This expression set says: “take the current Columns value (the target) and add 1 to it”. The final evaluated number is then set as the new Columns value. Try pressing 1 on your keyboard to increment the value.
¶ Example 3: Setting a value from a boolean test
Another use of expressions is assigning different values based on the result of a boolean test. For instance, we could check to see if a value is greater than some sort of threshold, and if so, limit the value from increasing. Our test function is comprised of 3 comma-separated arguments and it’s written in this form:
test(argument1, argument2, argument3)
Looking at the 3 command-separated elements, the first element is the test statement, the second represents the value to set if the test is true and the third is the value to set if the test is false.
Let’s expand on the previous example to see how to use it.
-
If not already selected, ensure the Hotkey is selected from the Library and the 3D Object Set is selected on the Scene Layout panel. The Expression Wire we connected in the previous example should be visible.
-
Click the wire to display its properties.
-
Now, let’s clear and change the Expression to read:
test(<target> < 10, <target> + 1, 10)
This essentially says: “test to see if our target is less than 10, if so set the value it to the current target value + 1, else set it to 10”. In other words, keep adding 1 to the target until 10 is reached, then keep setting 10 (the limit).
You may need to manually reset the Columns property to 1 by setting the property value back to 1. Then, press 1 on your keyboard repeatedly. You should see the value increment until 10 is reached.