¶ How to Apply a Texture to a 3D object in Blender, and Import it into PolypopLive
In this article, we’ll outline a workflow for importing 3D objects with textures created in Blender into PolypopLive.
All 3D objects are defined by one or more materials. Materials control how an object is shaded/rendered on screen. Materials can have a variety of properties such as color, reflection, and fake depth to name a few. Some of these properties can be textures which are simply image files.
For our Blender workflow, we’ll be using a standard built-in material to ensure it exports its properties and assigned textures in a way that PolypopLive understands.
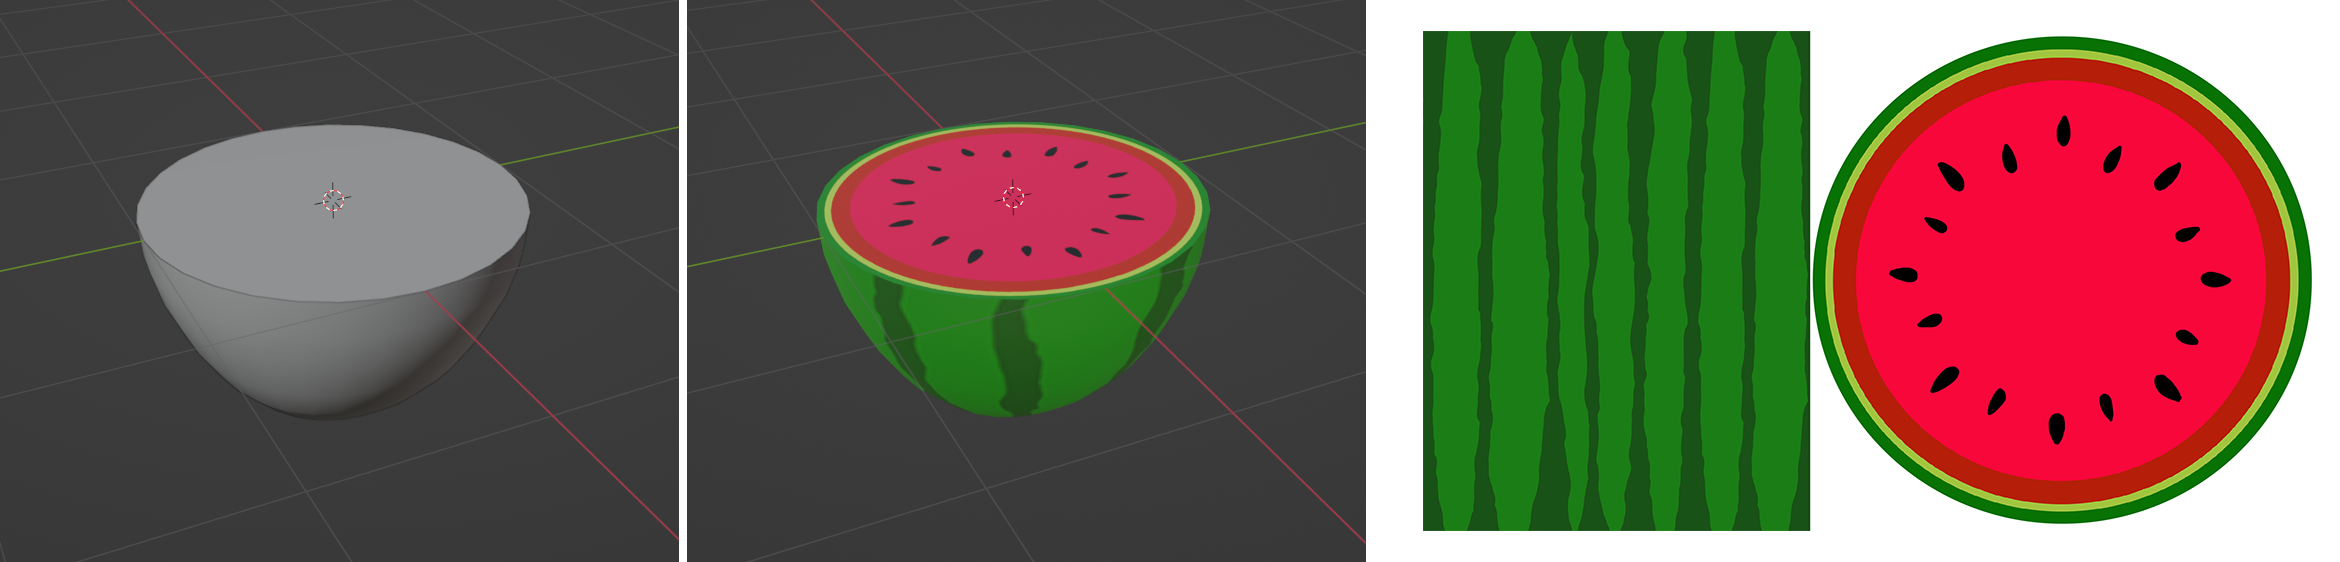
This image shows the transformation of a simple 3D half sphere, into a colorful and detailed object by assigning a texture to the material’s Base Color property.
In general, try keep your object’s total polygon count as low as possible to ensure it’s rendered efficiently in PolypopLive. A texture is a good way to represent details without the use of additional polygons.
¶ Assign a new Texture to a 3D object in Blender
Once you have your 3D object ready in Blender you can assign textures to it. Let's create a new material:
-
Select the 3D object you want to assign material to.
-
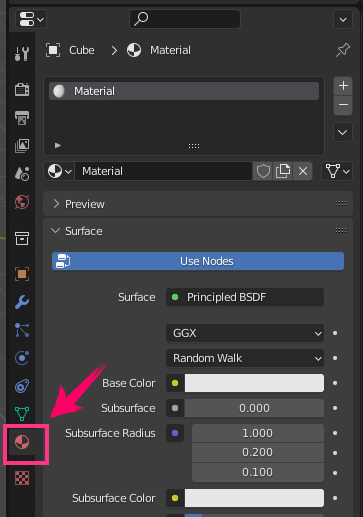
Select the “Materials” tab (with the sphere icon) in the user interface.
-
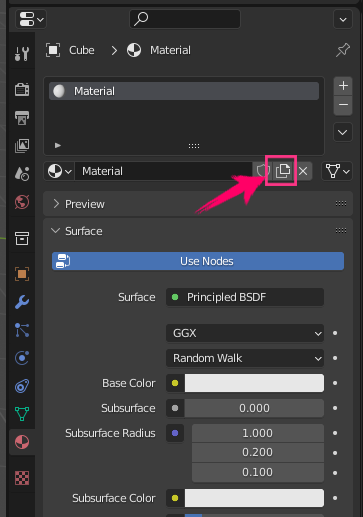
Click on the + button to create new material.
-
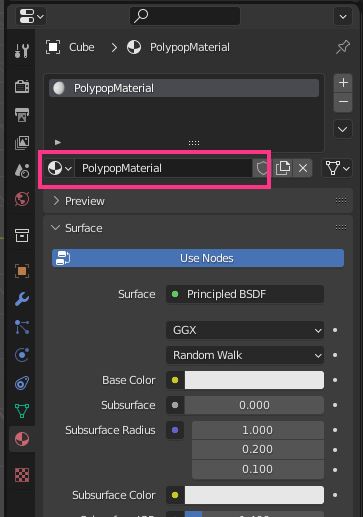
Rename the new material you just created and press Enter. For the purposes of this tutorial, we’ll call ours “PolypopMaterial”.
-
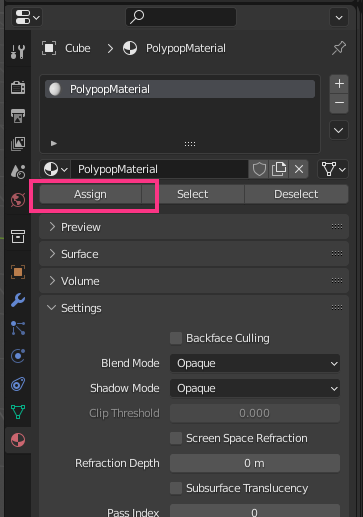
On your keyboard click the tab key, to go into Edit mode.
Notice how the new material’s Surface property is initialized to “Principled BSDF”. This is a standard Blender Material that exports well through to PolypopLive. Other surface types may not export correctly. -
Once you’re in Edit mode, a new Assign button will appear under the material. Click on the Assign button.
-
Now you will need to import your image texture file to Blender. You can prepare one on your own or download a premade texture from the web. There are many sites that offer free textures. Here is one for example: https://3dtextures.me/
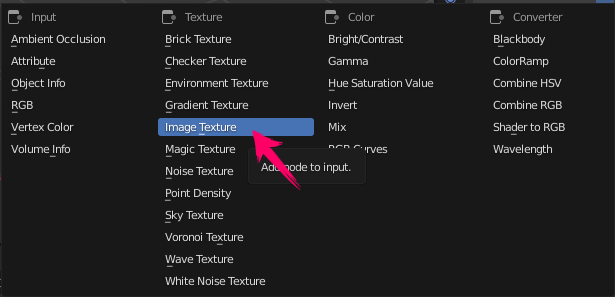
In the “Materials” tab, under the “Surface” section, search for “Base Color” and click on the small yellow dot to its left.
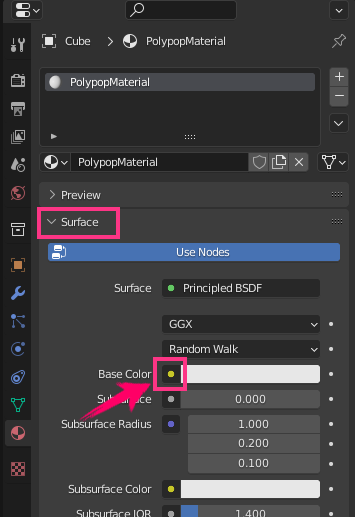
-
From the options displayed, click on “Image Texture”.
-
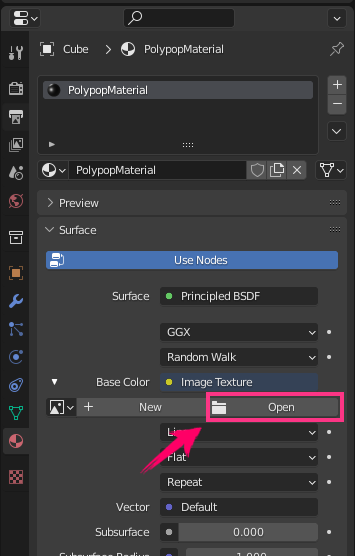
Click “Open”, and locate the texture file you want to use.
¶ Exporting a 3D object from Blender
Once you’re done applying textures to your 3D object (you can apply more than one texture), you need to export your 3D model to a format PolypopLive can read. We recommend exporting to an .obj file:
-
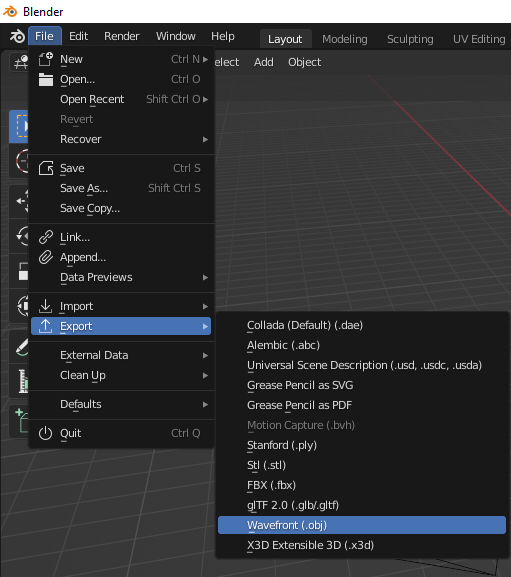
Go to File, Export, Wavefront (.obj).
-
Name your file and click “Export OBj”
¶ Importing a 3D object to PolypopLive
-
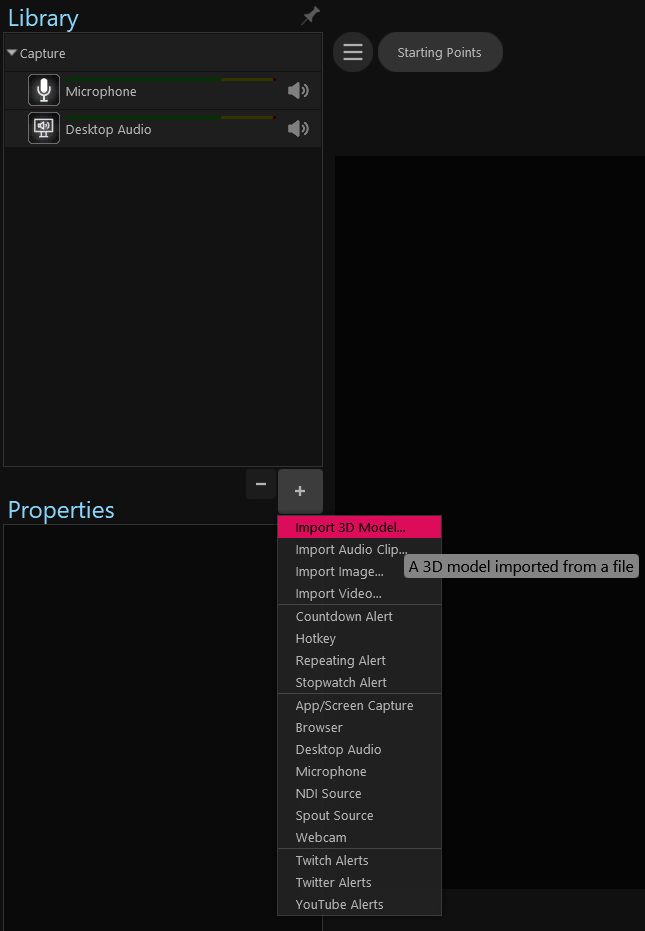
In PolypopLive open the Library and click on the + button.
-
Choose “Import 3D Model” from the drop-down menu.
Polypop will import the 3D model and will look for the image file to assign the texture to the 3D object. Make sure the image files are located at the same place you had them when you assigned the texture in Blender.
-
You can find the 3D model you imported in the Library under the 3D Models category.
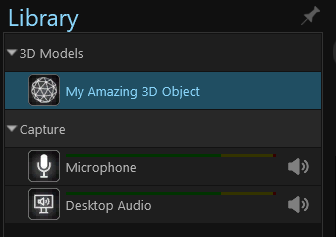
Your 3D model is now ready to be used in PolypopLive.
Before you import your 3D object to PolypopLive - make sure your texture image files and the .mtl file are stored next to the .obj file - so Polypop can find them.