¶ Impulse Alert - Audio Filter
In the Audio Filters article, we learned about audio filters in general, and how to add them to our audio source/scene/sound layer/global scene. This article will focus on the Impulse Alert audio filter.
The impulse Alert audio filter emits an alert whenever the audio signal reaches its peak above a predetermined cutoff. By connecting the Impulse Alert to 2D elements such as text, images, videos, or even 3D objects, you can make them react to the sound/beat. This can make an ordinary object come to life, and create a very dynamic-looking scene.
Like any other alert in PolypopLive, connecting the Impulse Alert audio filter to a Twitch or a YouTube alert, will give your audience the power to interact with your stream and shake things up.
An example of how a 2D text layer and 3D coins react to sound using the Impulse Alert audio filter.
This article is an add-on to the “Audio Filters” article. Please make sure you read the Audio Filters article before proceeding.
¶ Adding an Impulse Alert Audio Filter
In PolypopLive you have the flexibility to apply audio filters in four different ways:
- To an audio Source (in the Library).
- To the sound layer (in the Scene Layout).
- To a specific scene that would affect all sounds in the scene.
- To the Global Scene to affect any active scene, similar to a master bus filter.
In this guide, we'll take you through the process of incorporating the Impulse Alert audio filter into your scene audio. This technique can be applied to any audio source, sound layer, or even the Global scene.
-
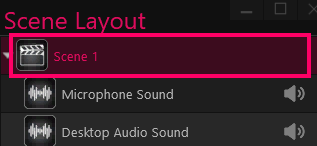
In your Scene Layout panel, select the scene layer.
-
Selecting the scene layer will show us its properties at the bottom of the Scene Layout panel.
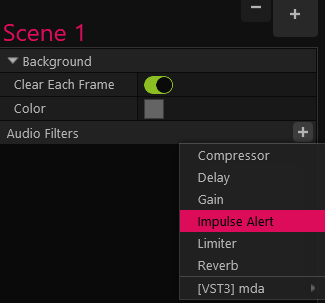
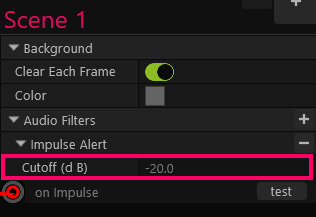
Click on the “+” button next to the “Audio Filters” line in the mic’s properties, and select the Impulse Alert option from the dropdown menu.
-
The Impulse Alert was added to our scene properties, under the audio filter menu.

¶ Connecting the Impulse Alert to an element in your scene
Now that we have an Impulse Alert audio filter in our scene, let's learn how to connect it to an element in the scene, so that it can react to a sound.
-
Ensure the scene layer is selected in the Scene Layout panel, and then, in its properties, pull a wire from the “on Impulse” socket of the Impulse Alert audio filter, and connect it to the flashing Action Sequence socket that appears in the top center of the screen.
-
Now, in the Action Sequence window add alerts that will create your desired animation. For example, you can add alerts to the sequence that will:
- change the scale of a 2D text layer.
- wait.
- scale it back to its original size.
The Impulse Alert audio filter is triggered when the audio in the scene reaches the level set by the Impulse Alert cutoff value. This will activate the animation that has been created, resulting in a dynamic visual response to the audio.
You can play with the cutoff value to achieve your desired result.
The Impulse Alert audio filter is connected to the Action Sequence that changes the size of the 2D text layer whenever the audio in the scene peaks the level of the Impulse Alert cutoff value.
To learn more about Action Sequences, their importance, and how they work please refer to the Action Sequences article.