¶ Setting Up Your Microphone
In this article, we’ll learn how to set up our microphone.
¶ Configuring Your Microphone
In PolyPop every starting point should come with one microphone source pre-added. You can find the microphone source by going to the Source Library at the top left of the app and expanding the Capture category item. Underneath, you will find your webcams, screen captures, and microphones.
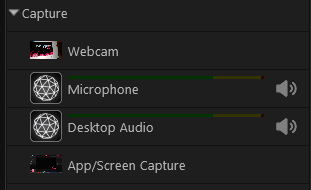
Once you find the microphone item, you will first need to make sure it is using the correct audio device, so that you can get audio from where you want it.
-
Click on the Microphone item in your Source Library.
-
Below the Source Library list, you will find properties for your selected microphone. Within these properties, you can change the microphone’s settings.

Let’s review what each property does:
¶ Mute
Simply toggle the on/off switch next to “Mute” in the Microphone settings.

To unmute, click the on/off switch again.

¶ Volume (dB)
You can use the slider to lower the volume of the microphone.

¶ Device
This item controls which device will be used as the microphone’s input. This is useful to select which input to use if your system has multiple recording devices present.

Clicking on the drop-down will allow you to choose which microphone to use with PolyPop.
¶ Testing your Microphone
You can use the Output Panel on the bottom of PolyPop to test your microphone and test how you sound before you start streaming.
- On the bottom of the screen, you should see a few buttons and an area labeled “Output Mix”.
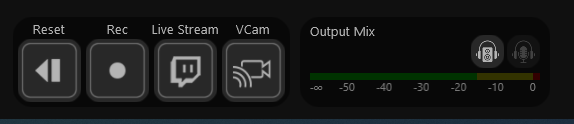
- To test your microphone, click the small button on the right with an image of headphones surrounding a speaker. This button enables you to monitor (hear) what the final audio mix of the current scene will be when it gets broadcasted or recorded.
- Now, click the button to the right of the button you just clicked (which should be no longer grayed out). This button allows you to monitor (hear) the output of the mic through your speakers.
You should only turn this feature on if you are using headphones. If you are using speakers and your microphone can hear their output, you will start getting unwanted feedback.
- Now, try saying something. You should hear it being played back to you through your headphones. If you don’t, try selecting a different device back under the Microphone’s properties until you are able to hear yourself.
¶ Delay (ms)
Some cameras encode their visual data slower than they encode their audio. This will break the sync between the audio and the video. To solve this, you can set the microphone to have a certain delay so that your audio and video are synced.

Simply use the slider to adjust the delay of the microphone (time is in milliseconds).