¶ Working With OBS
PolyPop Live can be used to live-stream either standalone or in conjunction with external broadcasting apps like OBS. In this way, you can layer in PolyPop Live’s unique effects and interactions into your existing OBS scenes. Let’s see how we can do this.
¶ Creating A Simple Test Scene
You can skip this section if you opened the ‘Using PolyPop with OBS’ tutorial starting point.
-
In PolyPop Live, click the ‘Starting Points' button at the top left of the screen then open the ‘Blank’ starting point located under the ‘Basic’ category.
-
Add a simple 2D Text layer to the current scene by clicking the + button under the Scene Layout list at the right-side of the screen then selecting the ‘2D Text' item located under the ‘2D’ category.
¶ Adding PolyPop Live as a Source in OBS
-
Launch OBS if it’s not already running.
-
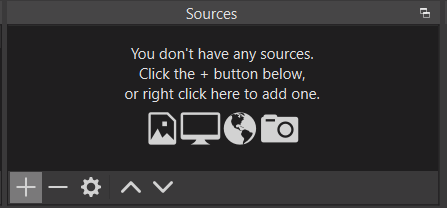
In OBS, click the + button under Sources.
-
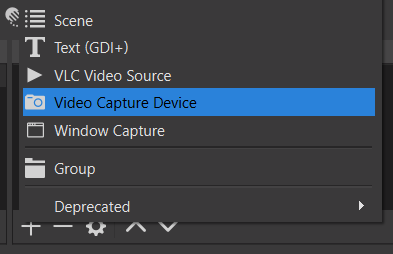
From the menu that appears, select 'Video Capture Device'.
-
On the popup that appears, click OK to create a new ‘Video Capture Device’. A new source should be added to your OBS scene and a popup will appear to configure the newly added ‘Video Capture Device’.
-
Now, from the ‘Device’ drop-down select ‘PolyPop Camera’.
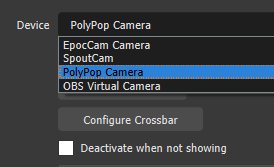
You should now see the contents of your PolyPop Live scene rendering inside OBS. If you switch back to PolyPop Live, you should see the ‘VCam’ output active.
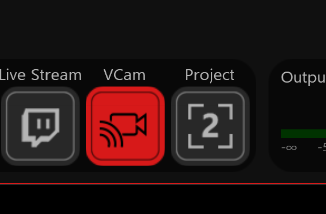
This tells us that PolyPop Live is actively rendering and sending its output to OBS. When we delete the source in OBS or exit OBS, the ‘VCam’ output should deactivate automatically.
In general, when no outputs are active in PolyPop Live and the app is minimized, its CPU and GPU usage should reduce to near zero thereby minimally impacting system performance and battery usage.
Now you can compose PolyPop Live’s output as a source within OBS and broadcast as you would normally. Alerts such as Hotkeys will remain active even if you minimize PolyPop Live.
¶ Enabling Alpha-Blended Output
By default, PolyPop Live sends its output as an opaque layer to OBS. Let’s see how to render PolyPop Live’s background as transparent inside OBS.
-
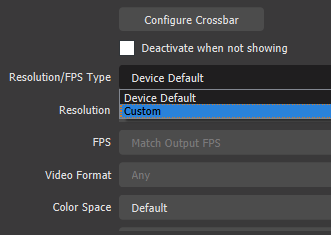
From the ‘Video Capture Device’ properties popup in OBS, select 'Custom' from the ‘Resolution/FPS Type’ drop-down.
-
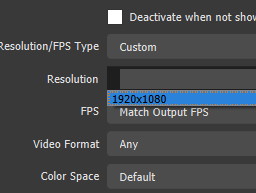
Next, select the single resolution shown under the ‘Resolution’ drop-down. Your resolution may differ from the image below depending on your PolyPop Live output settings.
-
Finally, select ‘ARGB’ from the ‘Video Format’ drop-down.
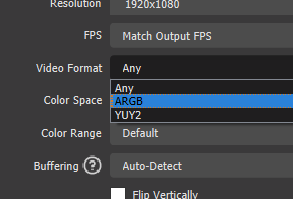
PolyPop Live’s background will now be treated as transparent allowing the source to be used for foreground layering.
Note that not all alpha-blended objects will render exactly as they do in PolyPop Live when rendered through to OBS due to alpha-compositing limitations.