¶ Controlling External Devices like Philips Hue
The Web Requests plugin (part of the Candy Pack) enables you to make requests to URLs. Services like If This Then That (ifttt.com) can generate URLs that when visited, can trigger actions within their ecosystem, including triggering actions that control a variety of devices and services that they integrate with.
In this tutorial, we’ll configure an automation using ifttt.com to turn on a Philips Hue light and create an action in PolypopLive to trigger it.
¶ Configuring ifttt.com
First off, let’s see how to create the automation on ifttt.com.
If you don’t already have an account, you’ll need to sign-up for one at http://ifttt.com.
-
First off, ensure you are logged into your http://ifttt.com account.
-
Next, click the 'Create' button at the top right of ifttt.com.

-
Next, click the ‘Add’ button located next to 'If This'.
-
In the 'Search services' bar, search for the keyword “webhooks”
-
A single item should appear underneath called “Webhooks”. Click it.
-
Next select the item entitled “Receive a web request”
-
On the next screen, enter ‘turn_on_lights’ for the Event Name.
-
Click “Create trigger”
This will assign the new trigger as the “If” directive. Now we need to configure what happens when this directive fires.
-
Click the ‘Add’ button located next to 'Then That'.
-
In the ‘Search services’ bar, search for “philips hue”.
-
Select the “Philips Hue” item that appears.
-
Next, select the “Turn on lights' item.
-
On the next screen, click “Connect” to connect your Philips Hue account.
-
Next, select your light from the 'Which lights' drop-down.
-
Finally, click “Create action”
-
On the next screen, click “Continue”
-
Finally, click “Finish”
The automation is now created. The last thing we need to do is get the URL that ifttt.com provides that when requested by PolypopLive, will trigger the automation.
-
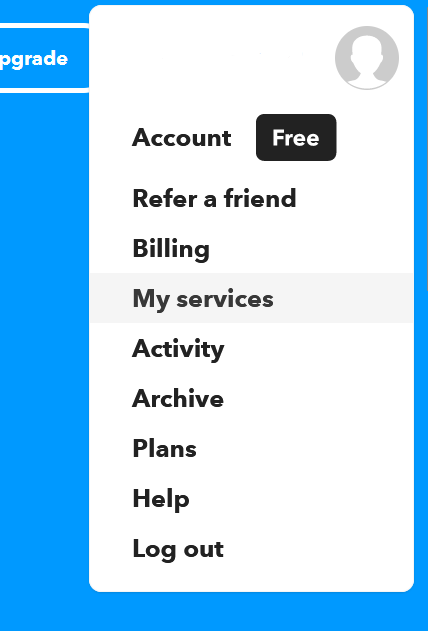
At the top-right of ifttt.com, click your profile image.
-
From the menu that appears, select “My services”

-
Scroll down to the bottom of the page and click “Webhooks”.
-
On the next screen, click the “Documentation” button.
-
Next, replace ‘{event}' with our event name 'turn_on_lights’ in the box within the URL under ‘Make a POST or GET web request to’

-
Finally, select the completed URL shown and copy it to your clipboard using Ctrl+C.

¶ Configuring PolypopLive
Now that we have our URL, let’s create an action in PolypopLive that we can wire that will trigger the ifttt.com automation.
If you haven’t already installed the Web Requests plugin, please do so now. You can find it under the Candy Pack category located in the Plugins browser. For more information, click here.
-
In PolypopLive, if your library is not already open, click the 'Open Library' button located on the bottom left.
-
Next click the + button under the Library item list.
-
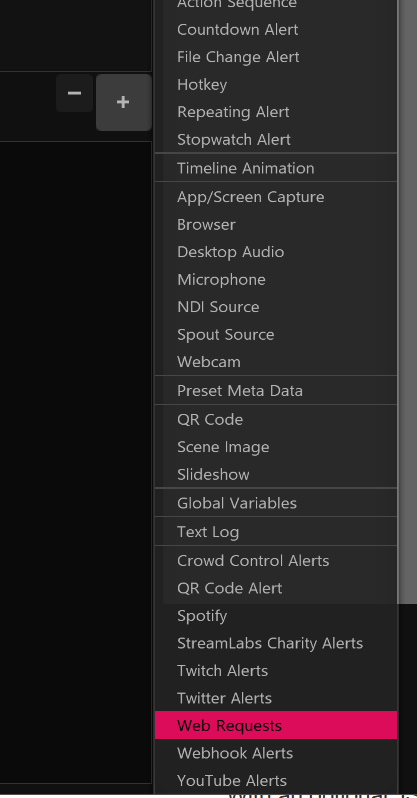
Select Web Requests from the menu that appears.

-
A new Web Requests source should be added to your Library.
-
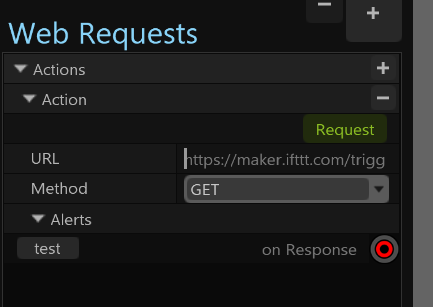
Ensure the Web Requests item is selected in your Library, then from the properties shown underneath, paste (Ctrl+V) the URL we copied earlier into the URL property.

We can now connect any alert/wire to the Web Request’s ‘Request' action (green button) to trigger our automation. Let’s configure a simple hotkey to trigger it.
-
Click the + button under the Library item list.
-
Select ‘Hotkey’ from the menu that appears.
-
From the Hotkey properties at the bottom, click ‘[unassigned]’ next to the Hotkey property and press 1 on your keyboard to assign the 1 key to trigger the hotkey.
-
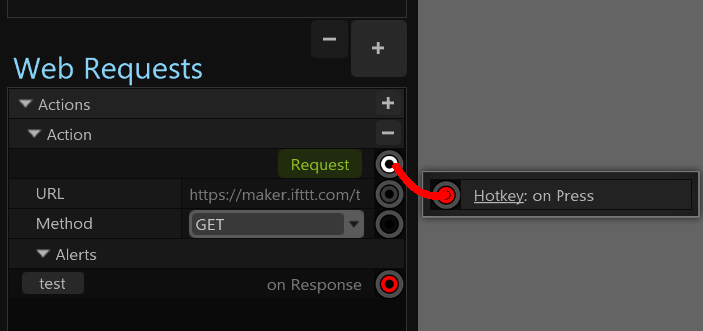
Next, left-click the red socket located next to the 'on Press' alert and drag your mouse to pull a wire.
-
Now, without letting go of left-click, hover your mouse over the ‘Web Requests’ item on the Library. This will cause the ‘Web Requests’ item to be selected, displaying its properties below.
-
Finally, connect the wire by releasing your mouse over the flashing white socket next to the 'Request' button.

Now whenever your press the 1 key, the request will be made, triggering the automation you created on ifttt.com. Instead of a hotkey, you can wire any alert (like Chat Commands or QR Code Alerts) to the Request action to create interesting viewer controlled interactive features.
ifttt.com has many other device integrations as well. Instead of selecting Philips Hue for the 'Then' directive, you can try selecting some other interesting service/device you may have.