¶ Crowd Control Plugin
Crowd Control is an app that enables your audience to influence your gameplay. PolypopLive’s Crowd Control plugin allows you to create custom reactions within PolypopLive whenever a viewer redeems a Crowd Control effect.
After installing the Crowd Control plugin, you can choose to either use the provided preset or create your own set of alerts.
You can install and experiment with the Crowd Control plugin in PolypopLive, but in order to fully integrate PolypopLive with the Crowd Control app features, you will need to install the Crowd Control app on your PC. Simply head to the Crowd Control website and follow the provided instructions for installation.
¶ How to install the Crowd Control plugin
Plugins allow users to customize PolypopLive to their specific needs by installing only the features they want to use. This can help keep the core application lean and efficient. It also allows for flexibility and customization, as users can choose which features they want to use and can easily install or remove them as needed.
-
Click on the Plugins button located at the top of the UI.

-
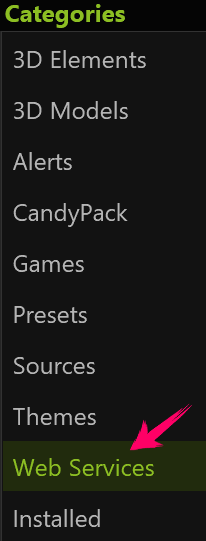
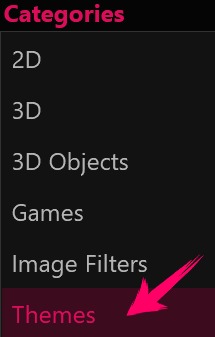
Select the Themes category from the menu.
-
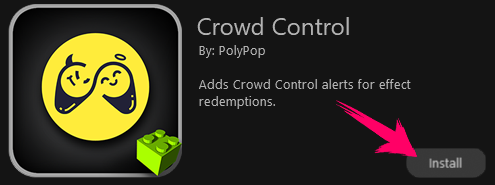
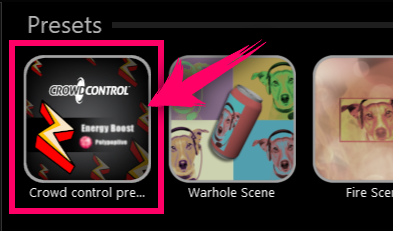
Browse through the options until you find the Crowd Control plugin
and click the "Install" button next to it.
Once the plugin is installed - all of its assets (such as the Alerts preset and the Library Crowd Control source) will be placed in their designated place in the app.
This document will show you what they are and where are they located.
¶ Crowd Control Alerts Preset
The Crowd Control Alerts Preset is a set of alerts that are automatically activated when a viewer interacts with your gameplay via Crowd Control. These alerts display: The name of the effect the viewer is adding, such as "Add Time" or "Power Up”, along with the icon representing the effect, and also the viewer's name and profile picture.
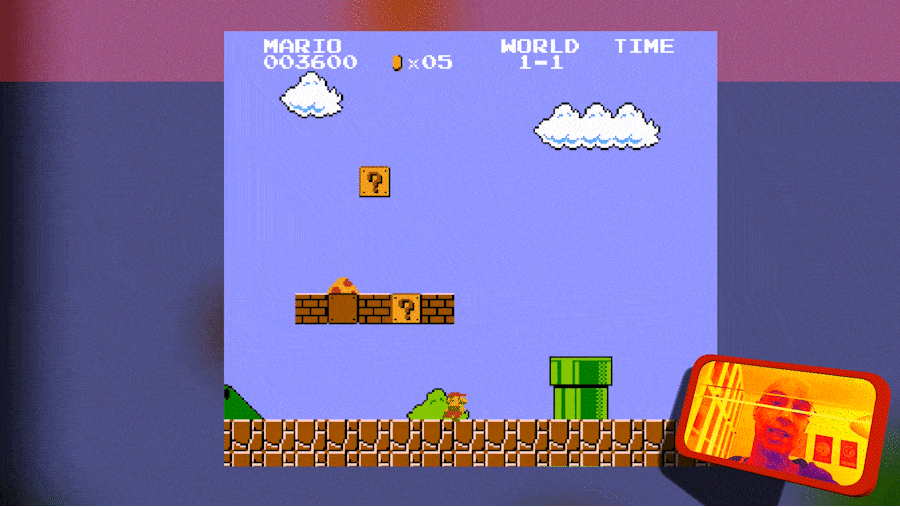
In this video, you can see an instance of the Crowd Control alert feature being demonstrated. Specifically, a viewer by the name of "polypoplive" has donated a "Power Up" effect to the streamer.
¶ To add the Crowd Control Alerts Preset to your project
-
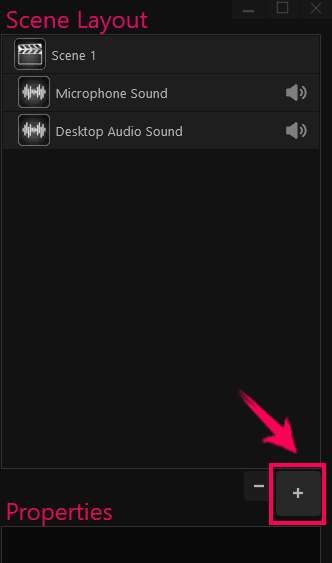
Click on the big + button in the Scene Layout panel (on the left side of the app).
-
Select the Themes category from the menu.
-
Double-click the Crowd Control Preset Icon.
-
A new layer group named “Crowd Control Alerts” was added to your Global Scene.
If your project did not have a Global Scene in it, Polypop will automatically add it for you.
If you would like to learn more about the Global Scene, please refer to the Global Scene article.
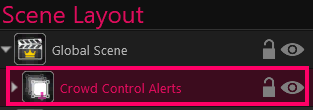
This group layer contains all the elements needed for the Crowd Control Alerts. -
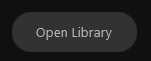
In addition, Polypop has now included in your Library Panel a new source called "Crowd Control Alerts". Access the Library Panel by clicking on the "Open Library" button located at the lower left-hand side of the application's interface.
-
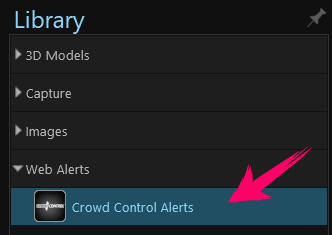
In the Library panel, select the “Crowd Control Alert” layer located under the “Web Alerts” category.
-
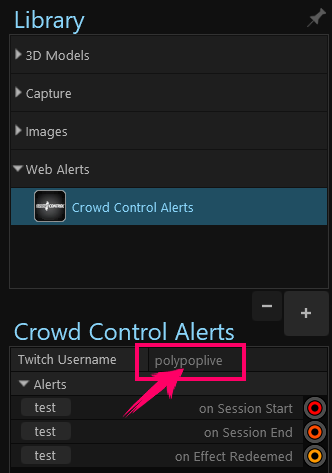
Selecting the “Crowd Control Alerts” layer will show us its properties.
If your Polypop account is linked to your Twitch account, your Twitch username will be automatically included in the alert. However, if your Twitch user name is not visible or you wish to link a different account, you can manually input your Twitch user name.
-
From now on, whenever a viewer donates a Crowd Control effect during your gameplay, the alert displayed above will be activated.
¶ Create your own Crowd Control Alerts
As mentioned above you can utilize Polypop’s powerful game engine to create your own set of alerts.
¶ To create a Crowd Control alert:
-
Open the Library by clicking the “Open Library” button on the lower left side of the screen.
-
In the Library panel, select the “Crowd Control Alert” layer located under the “Web Alerts” category.
-
Selecting the “Crowd Control Alerts” layer will show us its properties.
If your Polypop account is linked to your Twitch account, your Twitch username will be automatically included in the alert. However, if your Twitch user name is not visible or you wish to link a different account, you can manually input your Twitch user name.
-
Now, click and drag your mouse from the “on Effect Redeemed” alert socket to pull out a wire.
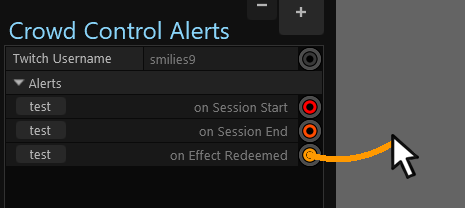
-
Next, attach the wire to the Action Sequence socket that should now be visible on the top center of the user interface.
You now have the option to create a set of actions or events that will occur automatically whenever someone donates an effect to your gameplay. This means that you can personalize and enhance your gaming experience even further.
To learn more about Action Sequences please refer to the Action Sequences article.
¶ Pulling data from the “on Effect Redeem” alert
If you're creating alerts using the "on Effect Redeem" wire, there are several data fields available that you can use to customize your alerts. By connecting the alert to a 2D or 3D text layer, you can display information that corresponds to the data provided by the alert. Specifically, the "on Effect Redeem" alert can provide details such as the game name, effect name (e.g., "Power Up"), the name of the viewer who donated the effect, and the effect cost.
Alternatively, connecting the "on Effect Redeem" alert to a 2D or 3D image layer allows you to display different images based on the information provided by the alert. For example, you could display the profile picture of the viewer who donated the effect or the effect's icon image.
To learn how to use use the alert's data please refer to the Alerts, Actions and Wire Properties article.