¶ Global Variables Plugin
This Plugin allows you to add global variables to your Library, that can be used to set property values centrally or can act as temporary values to further assign values to other properties.
¶ Installing the Expression Wire plugin
¶ Switching PolypopLive to Developer Mode
To be able to see and install the Global Variables Plugin, you will need to switch to developer mode. This special mode allows you to access advanced features and make customizations that may not be available in the standard user mode.
-
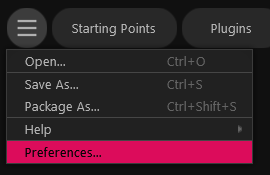
Click on the menu icon at to top of the user interface.

-
Choose the Preferences option from the dropdown menu.
-
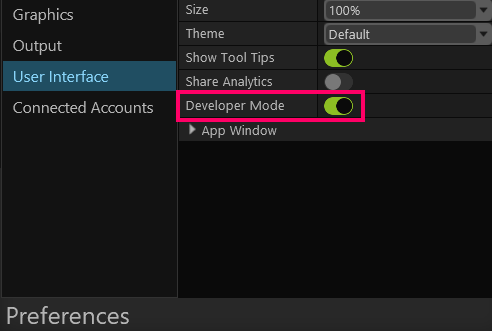
Select the User Interface option and enable the Developer Mode option.
¶ Installing the Global Variables Plugin
Plugins allow users to customize PolypopLive to their specific needs by installing only the features they require.
To learn more about the Candy Pack add-on and all the plugins that are included with it click here.
-
Click on the Plugins button located at the top of the UI.

-
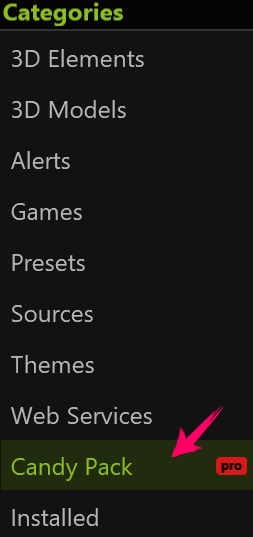
Select the “Candy Pack” category from the menu.
-
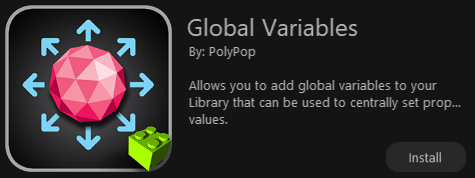
Click the "Install" button next to Global Variables Plugin.
-
You can add a Global Variables source to your Library panel.
If the plugin is already installed it means you already have it. You do not need to install it again.
¶ Using the Global Variables Source
Let’s add a Global Variables source to our Library to see how it works.
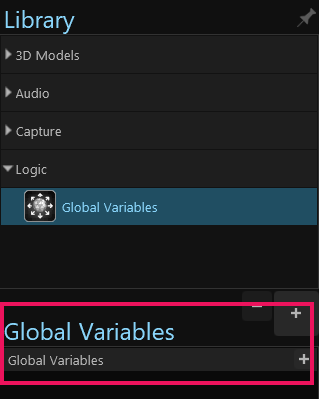
¶ Adding the Global Variables Source to your Library panel
-
First, open the Library panel by clicking the + button on the bottom left side of the screen.

-
To pin the Library panel to the UI, click on the pin icon located at the top-right corner of the panel.
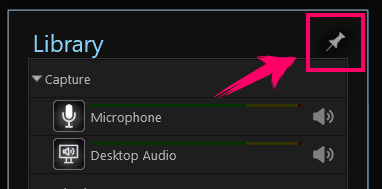
(While this step can make the subsequent stages more convenient, it is not mandatory). -
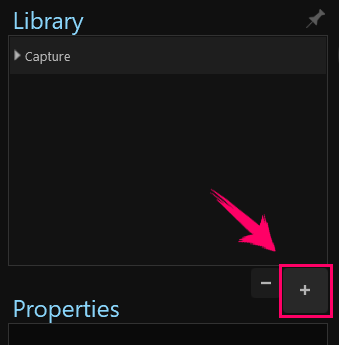
Click the + button on the bottom right of the Library panel.
-
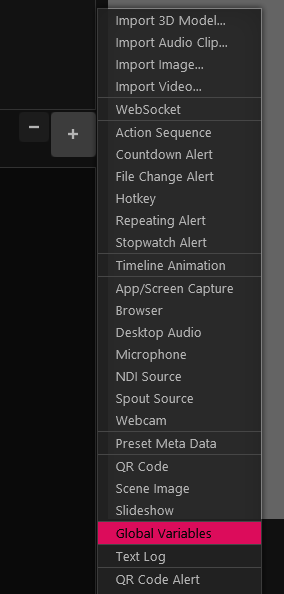
Next, from the menu that appears, click the Global Variables item.
-
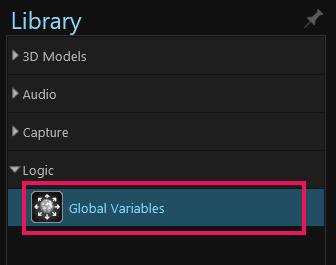
A new “Global Variables” layer was added to your Library Panel.
-
Selecting the “Global Variables” layer will show you its properties in the Library panel.
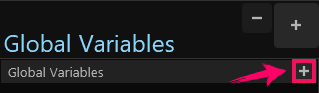
¶ Using the Global Variables Source
-
On the Global Variables properties, click the “+” button.
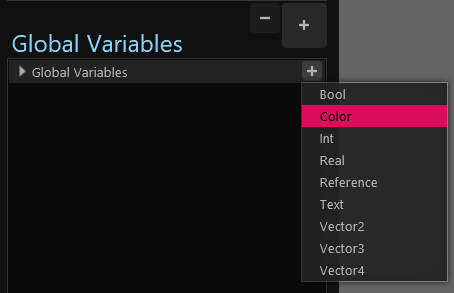
-
A menu of available property types is listed.

-
Let’s look at each property type:
- Bool: This represents a boolean property. It’s equivalent to an on/off switch.
- Color: A 4-element color property that lets you choose a color.
- Int: A simple numeric integer property, without a decimal point.
- Real: A numeric property that can include a decimal point and a fractional portion.
- Reference: A property that can hold a reference to an object or element (by dragging and dropping an elements thumbnail onto it)
- Text: A property that contains a text value.
- Vector 2/3/4: Properties that hold 2, 3, or 4 simultaneous values. For instance, a 3D transform position is a Vector3 since it is represented by 3 values.
-
Let’s continue our example: click the “Color” item to create a Color property.
-
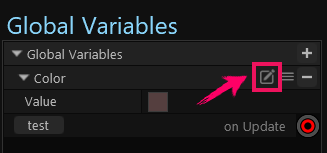
Expand the newly added Color property.
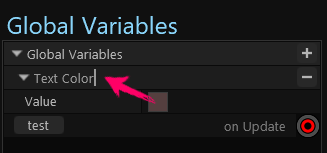
As you can see, it's a simple property that lets us select a color. There’s also an alert called “on Update” that will fire whenever the property value changes. Every type of global property you create has this alert. The alert contains a data field called <value> that contains the current value of the property. Let’s give our new Color property a unique name.
-
Hover over the “Color” group and click the rename icon.
-
Enter the name “Text Color” and press enter.
Now, let’s apply this color to two different elements in the canvas to set them centrally.
Since this example requires the Expression Wire, please install the Candy Pack / Expression Wire from the plugin browser if you haven’t already done so.
Let’s add two different elements to the canvas.
-
Click the “+” button on the Scene Layout panel.
-
Select the 3D category.
-
Add a 3D Text to the scene.
-
A 3D Text element should be on your scene. Now duplicate the element by copying and pasting it or holding down the Alt key while clicking and dragging it.
-
You should now have 2 3D Text elements in your scene.
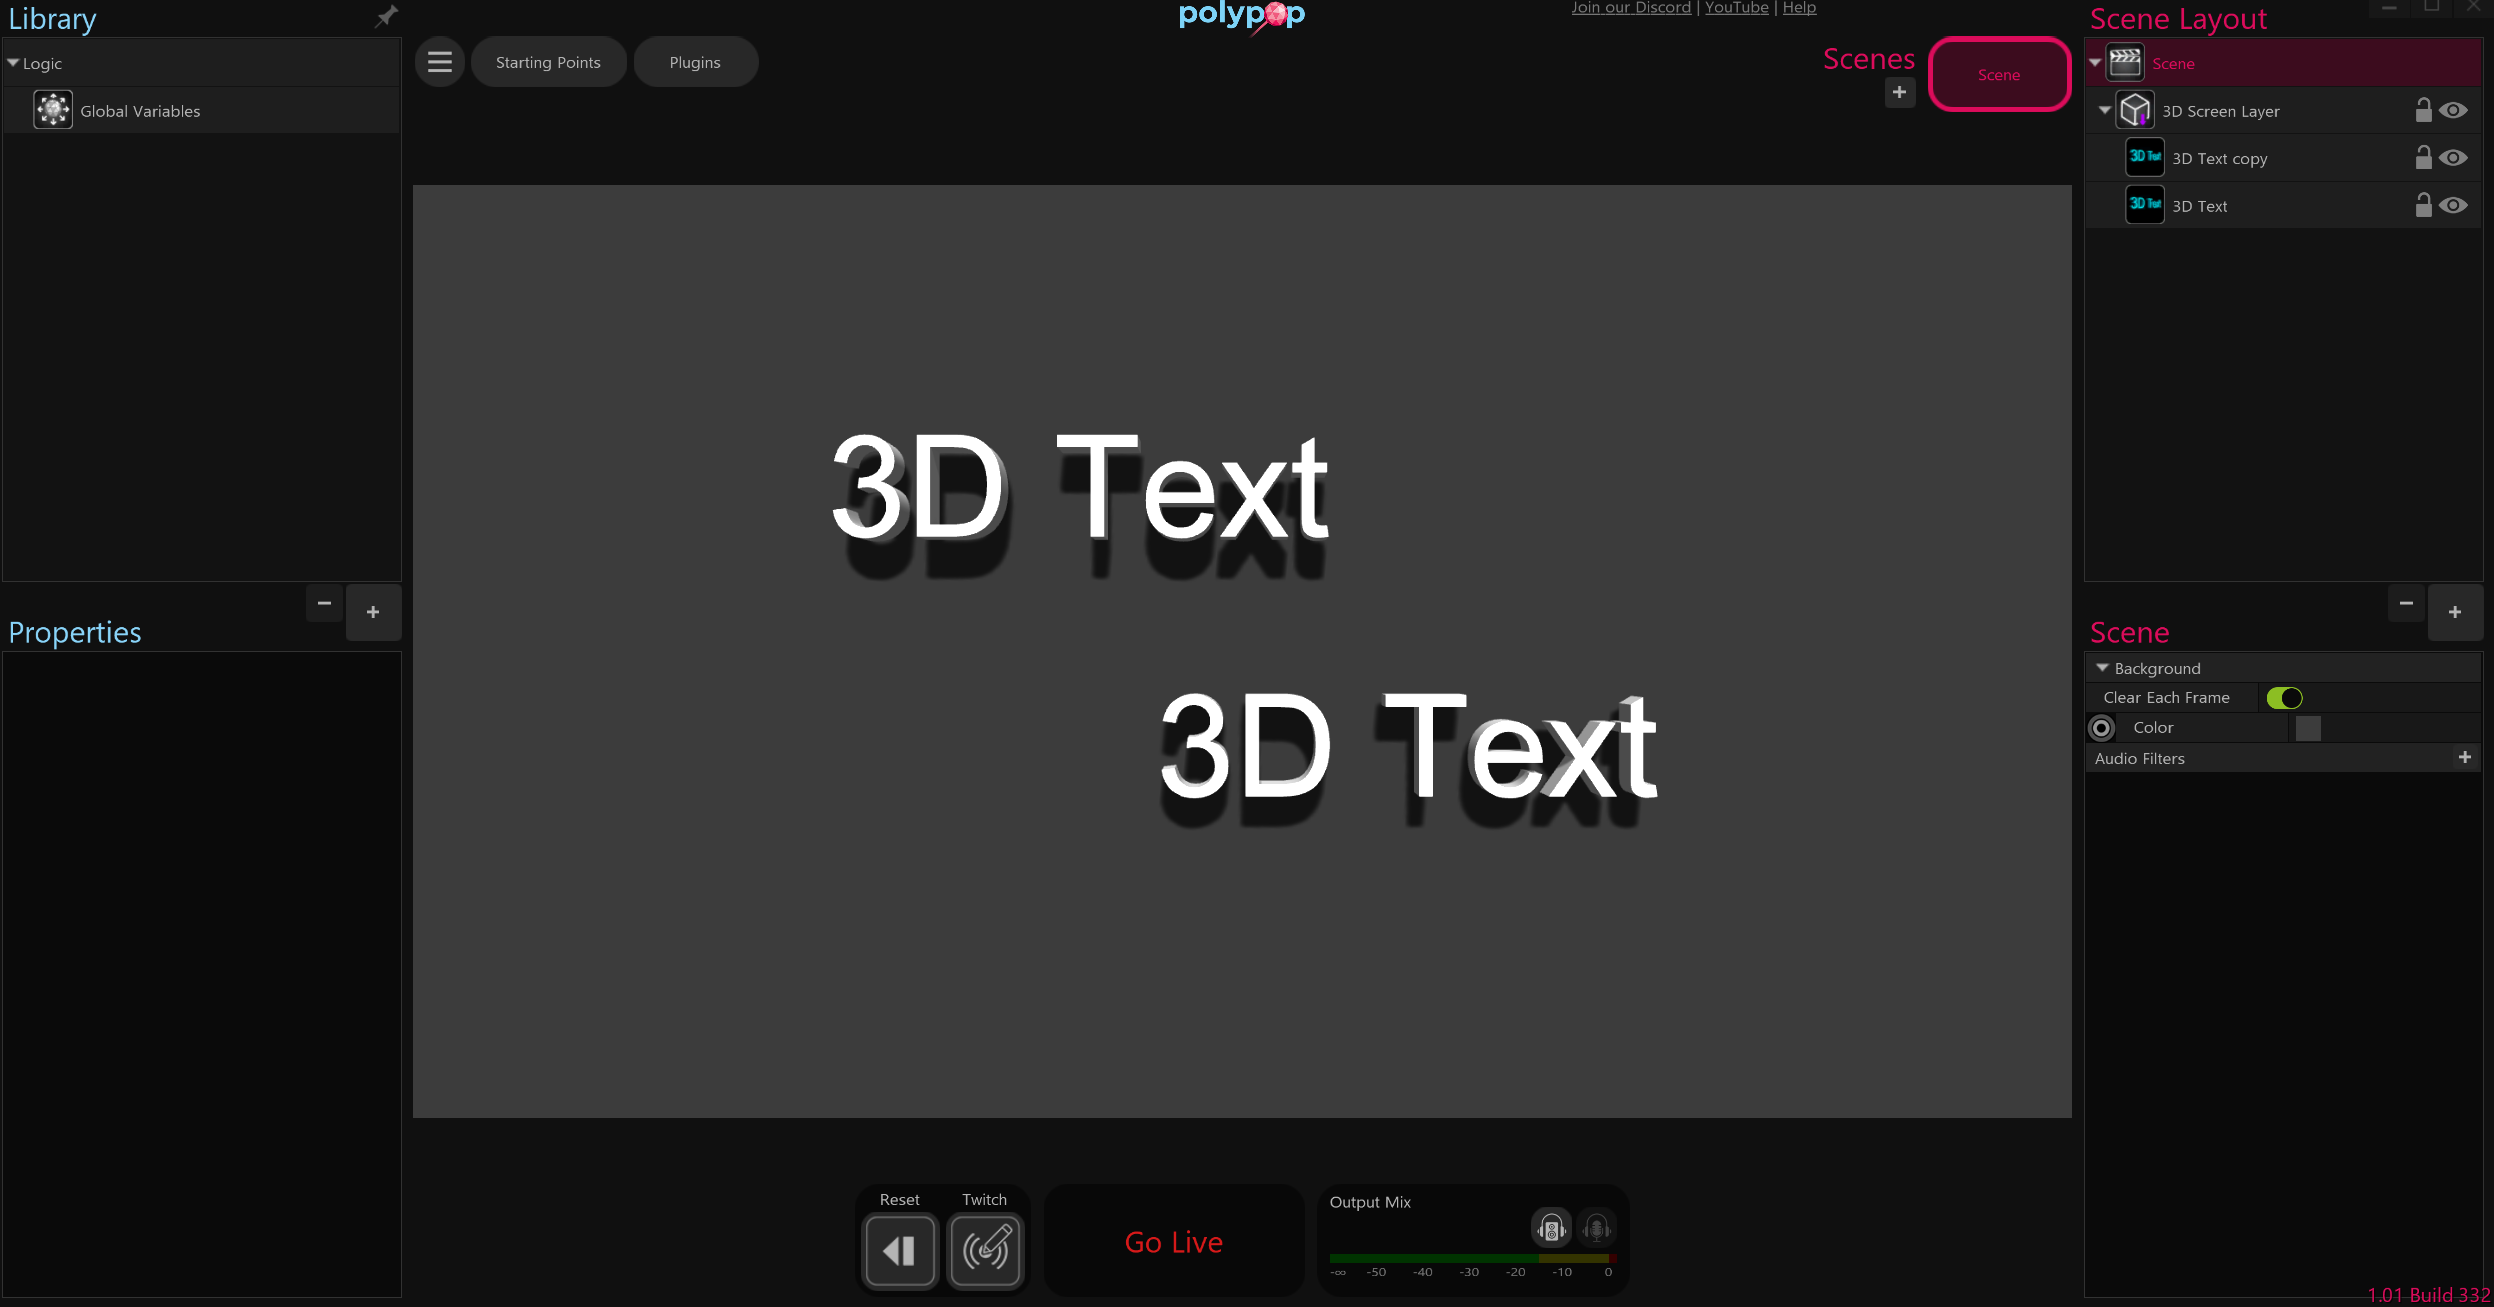
Now let’s connect our Text Color global variable to each 3D Text’s color property.
-
Select the first 3D Text item.
-
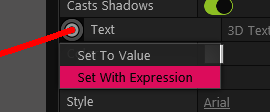
On the Text Color Global Variable properties, left-click the red socket next to “on Update” and drag a wire and connect it to the Color property of the 3D Text.
-
Select “Set With Expression” from the menu that appears.
The default Expression <value> means it will assign the global variable’s <value> field directly to the Color property. Now let’s repeat the prior 3 steps to connect the Text Color Global Variable to the other 3D Text Color property.
-
Close the Wire properties by clicking anywhere outside the popup.
-
Select the other 3D Text.
-
Connect a wire from the Text Color Global Variable to the 3D Text Color property.
-
Select the “Set With Expression” item from the menu that appears.
Now, when we change the value of our Text Color from the Global Variables property, it should update both text Colors at the same time.
¶ Global Variables in Expressions
Global variables can also be used directly inside any Expression Wire’s Expression. By clicking the variable list button (small arrow button on the right of the Expression line), it will include any global variables present. We can then use these variables in expression formulas.
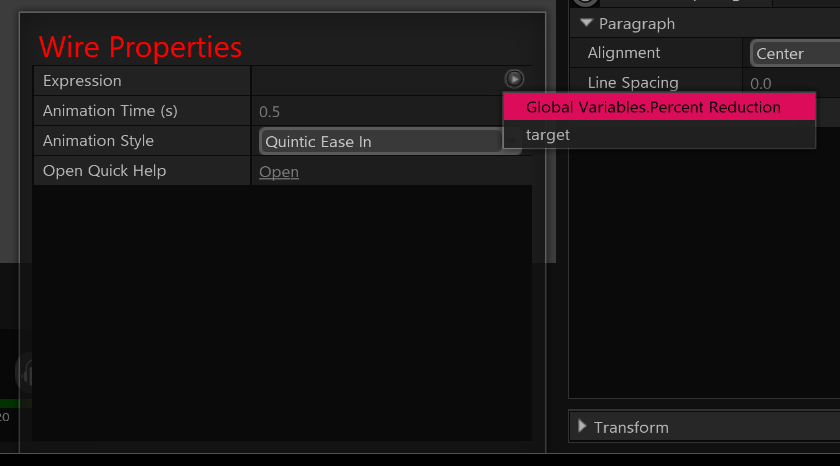
For instance, in the above example, we could use the global variable we created called “Percent Reduction” to reduce a target value by a percent whenever the alert fires. Here would be the Expression:
<target> * <Global Variables.Percent Reduction>
We could then easily adjust our percent through the Global Variables properties to affect any Expression that uses it.