¶ Object Emitters
An object emitter is a tool that allows you to generate multiple copies of a 3D object, either as a single burst or continuously over time. This can be useful for creating large numbers of objects quickly and efficiently, for creating special effects, or for populating a scene with multiple copies of the same object, without having to manually place each one individually.
Object emitters can also be used to add randomness to your animations, allowing you to create variations of the same animation to keep your content fresh and engaging.
There are two ways you can add an object emitter to your project:
- Adding a 3D object as an object emitter.
- Adding a blank emitter
This document will review both ways.
¶ Add a 3D object from the 3D Library as an object emitter
-
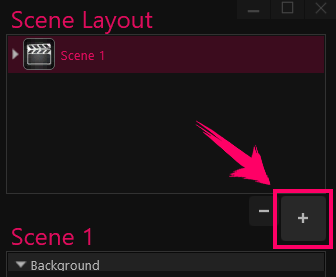
Click on the big + button in the Scene Layout panel.
-
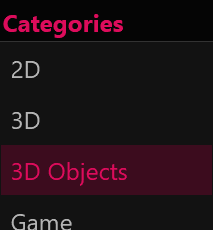
Select the 3D objects option from the menu.
-
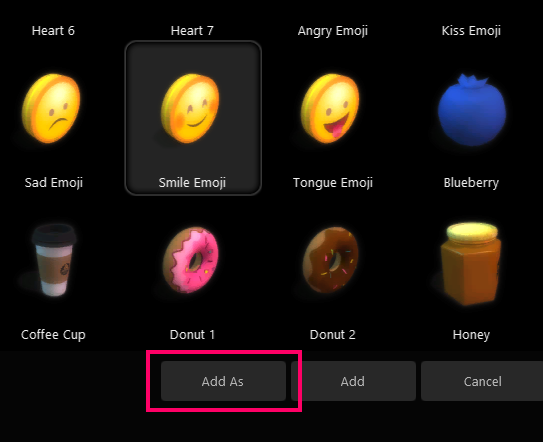
Browse through the objects until you find the 3D object you were looking for.
-
Select the 3D object you want by clicking on it only once. Doing that will add an “Add As” button at the bottom of your screen.
-
Click on the Add As button and select the “3D Object Emitter” item, from the dropdown menu.

-
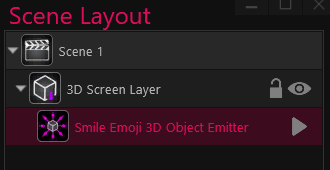
You now have a new 3D Object Emitter layer in your Scene Layout panel.
-
On your canvas, you will see an emitter icon that indicates the location from which 3D objects will be emitted.

When the virtual camera is turned on, or when you go live or record, the object emitters icons will not be displayed on the canvas.
If you need to expand your collection of 3D objects, you can easily install additional models by clicking the Plugins button at the top of the app and selecting the 3D models category. This will give you access to a range of additional 3D objects that you can add to your 3D Library. Simply click the install button for the models you want to add and they will be added to your 3D library for use in your projects. To learn more about plugins please refer to the Plugins article.
¶ Emit Objects
To emit objects from the emitter, first, select the emitter layer in the Scene Layout panel. Then, click the “Emit Burst” button.
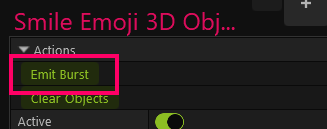
By clicking on the "Emit Burst" button, you can create a burst using the default settings of the emitter.
There are plenty of properties to experiment with and explore, so let's take a look at them.
You can connect the Emit Burst action to a hotkey, alert, or action sequence. For instructions on how to do this, please refer to the Action Sequences article.
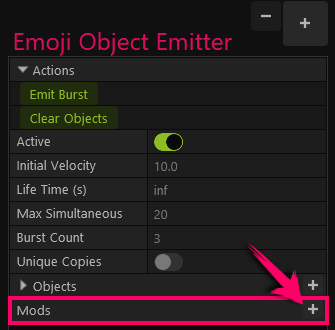
¶ Emitter Properties
To view the properties of the emitter, ensure that the emitter layer is selected in the Scene Layout panel.
The layer’s properties will be shown at the bottom of the Scene Layout panel.
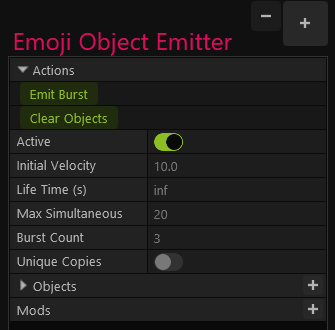
¶ Active
This toggle button controls whether the object is active/visible in the scene.
¶ Initial Velocity
This value controls the initial velocity of objects with physics that are rejected from the emitter.
¶ Life Time (s)
Controls how long emitted objects remain before disappearing. The default value is infinite.
¶ Max Simultaneous
Controls how many objects are allowed to exist at once before removing the oldest object.
¶ Burst Count
Controls how many objects are emitted at once by the Emit Burst action.
¶ Unique Copies
Ensures each emitted object is unique (e.g. allows a 3D Text object to be emitted with different texts).
All the properties above are the Emitter properties.
The Emitted objects (the objects that are being emitted) properties are located under the Objects menu.
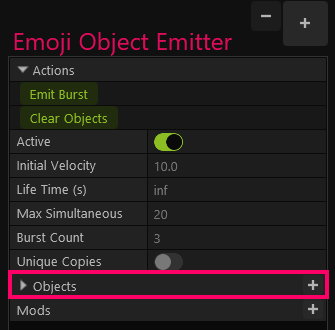
¶ Objects
The Objects menu contains information about the emitted object.
¶ Emitted Objects Properties
-
Expand the Objects menu by clicking on the triangle next to it.
-
We can now see the Emitted object properties.
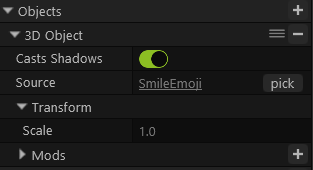
¶ Cast Shadows
Controls whether the object casts shadows onto itself and other objects.
¶ Source
The Source lets you see where the 3D object is in the Library panel. Clicking on the source will select the 3D object in the Library panel on the left side of the app.
Clicking on the Pick button will open a window that will let you replace the 3D object (prefab) with a different 3D object (prefab).
¶ Transform
Sets the size of the emitted object in the space.
¶ Mods
This is the Emitted Object mod menu (which is different from the Emitter mods). To read about this section, please scroll down to the “Emitted Objects Mods” section.
¶ Emitter Mods
You can add Mods to the emitter itself (represented by the icon on the canvas). Clicking on the + button will bring a menu with available mods.
It is important to note that there is a distinction between emitter mods and emitted object mods.
The highlight mods mentioned above will be applied to the emitter itself, rather than the emitted objects. For example, if you add a "Random Move" mod to the emitter, it will cause the emitter to move randomly on the canvas, but not the objects it emits.
If you want to add mods to the emitted 3D objects, such as the "Vary Color on Emit" mod, you can do so by expanding the Objects menu and adding the mods there.
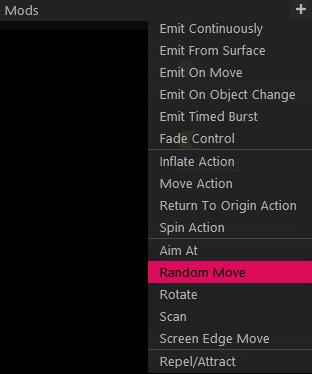
Clicking on the + button next to the Mods item, will bring a menu with available mods.
You can add as many mods as you wish to the emitter. However, please note that after adding a mod, certain mods may no longer be available due to conflicts with the added mod.
For example, if you add a Random Move mod, the Aim at, Rotate, and Screen Edge Move mods will no longer be available for use.
¶ Emitted Objects Mods
As mentioned above you can add mods to the emitter itself, and you can also add mods to the objects it emits.
This section will review the available mods for the emitted objects.
-
Make sure the emitter layer is selected in the Scene Layout panel - so you can view its properties.
-
In the emitter’s properties, expand the Objects menu by clicking on the triangle next to it.
-
Under the Objects menu, expand the 3D Object menu by clicking on the triangle next to it.

-
We can now see the Emitted object properties
-
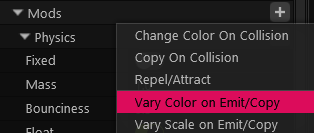
Expand the Mods menu by clicking on the triangle next to it.
-
We can see that by default the emitted objects already have a Physics mod added to them.
if you want to remove the physics mod you can click on the - button next to it.

-
Click on the + button next to the mod menu.
-
Selecting a mod from the dropdown menu will add that mod to the emitted objects.
¶ Emit Various objects from the same emitter
You can make an emitter emit different objects.
To learn how to do it, please refer to the Emit Various Objects From The Same Emitter article
¶ Adding a blank emitter
You can add a black emitter to your scene to create an emitter with no objects or mods assigned to it. This is an alternative to adding a 3D object as an object emitter.
-
Click on the big + button in the Scene Layout panel.
-
Select the 3D option from the menu.
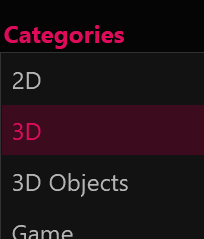
-
Double-click the 3D object emitter element from the elements options.

-
You now have an empty 3D object Emitter in your Scene.
To add objects to the emitter, such as 3D objects, 3D text, physics force, or user cards, click the "+" button next to the Objects menu in the emitter properties. This will allow the emitter to emit the objects you have selected. To learn more about that please refer to the Emit Various Objects From The Same Emitter article.