¶ Timeline Animation Plugin
Timeline animations allow you to record and playback complex animations involving one or more scene elements. By simply clicking the record button on the timeline, any adjustment you make will be captured as a keyframe. This includes actions, modifying an object's position, changing the color of an element, or tweaking a property value. All changes will be recorded on the timeline and can be replayed and tweaked at any time.
Alerts, such as hotkeys, can be used as triggers to play Timeline Animations.
¶ How to install the Timeline Animation Plugin
Plugins provide users with the ability to tailor PolypopLive according to their individual requirements, by enabling them to install only the specific features they need.
To learn more about the Candy Pack add-on and all the plugins that are included with it click here
¶ Installing the Timeline Animation plugin
-
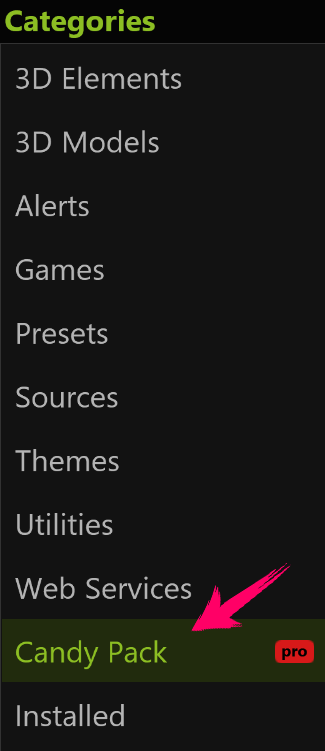
Click on the Plugins button located at the top of the UI.

-
Select The Candy Pack category from the list on the left.
-
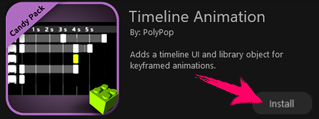
Browse through the plugin options and click the "Install" button next to the “Timeline Animation” plugin.
-
You can now add the Timeline Animation source to your project.
¶ Adding Timeline Animation to your project
-
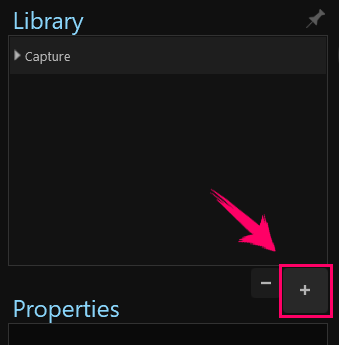
First, open the Library panel by clicking the + button on the bottom left side of the screen.
-
To pin the Library panel to the UI, click on the pin icon located at the top-right corner of the panel.
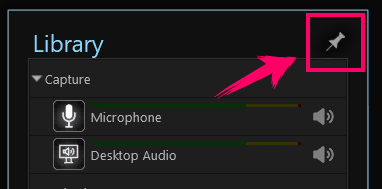
(While this step can make the subsequent stages more convenient, it is not mandatory). -
Click the + button on the bottom right of the Library panel.
-
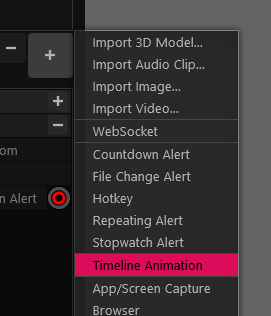
Next, from the menu that appears, click the Timeline Animation item.
-
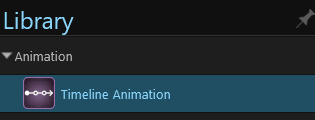
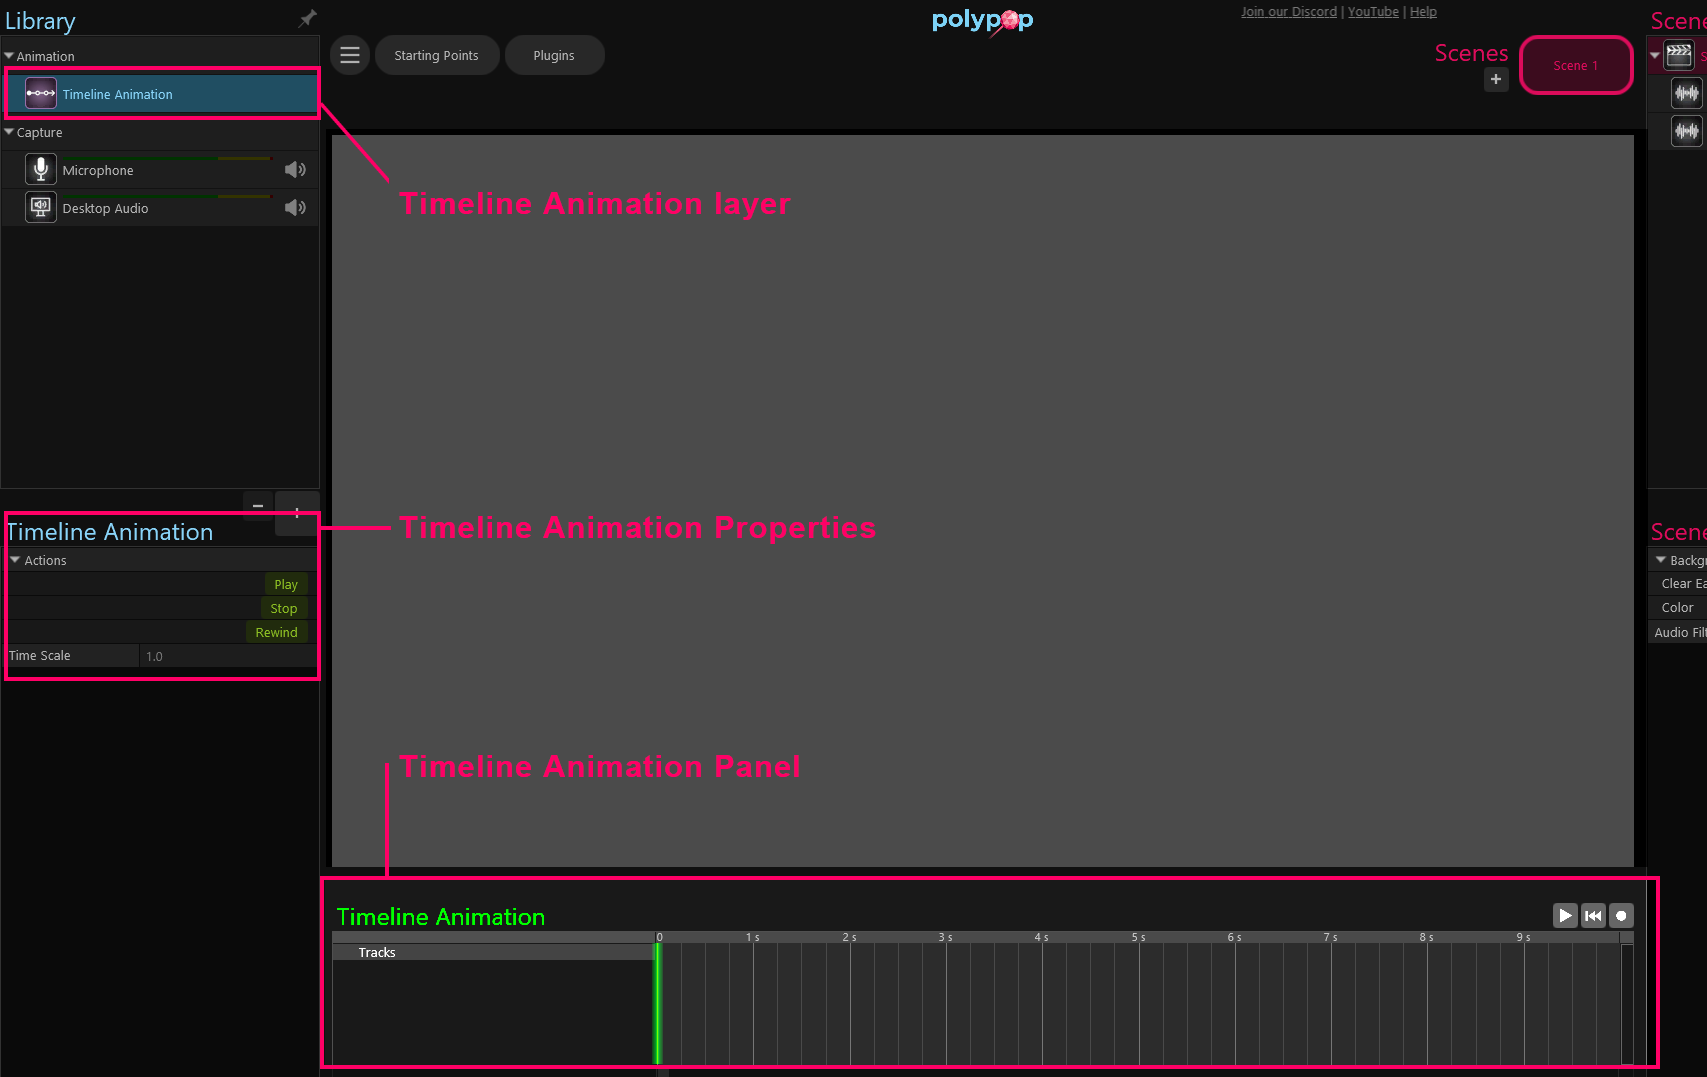
A new “Timeline Animation” layer was added to your Library Panel.
-
Selecting the Timeline Animation layer will show us the Timeline properties at the bottom of the Library panel, and will also expose the Timeline Animation panel at the bottom of the app.
¶ Creating an animation
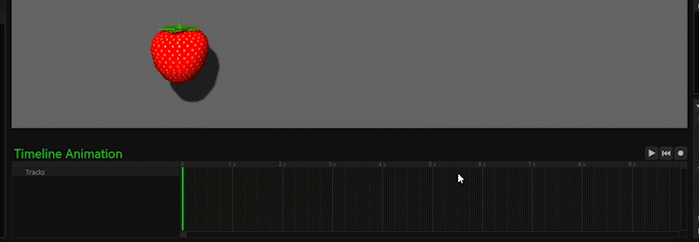
To demonstrate the workings of the Timeline-Animation, we need a layer in the Scene Layout panel that can be animated. You can animate any type of asset you have, such as images, videos, text, and more. For the purpose of this example, we will use a 3D strawberry object. However, you can choose any other object that you prefer.
-
To begin, we will add a strawberry 3D object to our scene by clicking on the “+” button in the Scene Layout panel, then selecting the 3D category option, and finally double-clicking on the Strawberry icon. If you are unable to locate the strawberry 3D object, you may need to install the “Food” plugin. However, please note that for the purpose of this example, you can select any other object that you prefer.
-
We have successfully added a 3D strawberry to our scene. Now, you can place the strawberry at any location of your choosing. This will serve as the starting point for the 3D strawberry animation.
-
Make sure that the Timeline Animation item is selected in the Library panel to ensure that the Timeline Animation panel is visible at the bottom of the screen.
-
Now, we can begin recording the animation. To do this, click on the record button located at the top right of the Timeline Animation panel.

Once you do this, to button will turn red, and PolypopLive will start recording any actions that you perform on the canvas. -
Using your mouse, click on the '2 s' label in the area where the seconds are marked. This action will move the green playhead to a new position on the timeline.
-
Next, move the 3D strawberry to a different location on the canvas. As a result, a new Strawberry Position track with two keyframes will be added to the Timeline Animation panel. This track represents the positional changes of our strawberry. The first keyframe will indicate the starting position of the strawberry, whereas the second keyframe, which is located at the 2-second mark on the timeline, will represent the new position of the strawberry that we have moved it to.
GIF animation loop of stages 4-6 -
Click again on the record button to stop the recording.
-
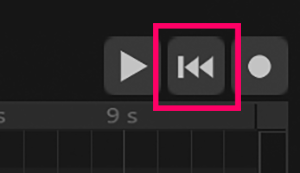
Next, click on the rewind button located next to the record button. this will move the green playhead to the beginning of the timeline.
-
Click on the play button located to the left of the rewind button. This will turn the play button green, and the animation we just created will be played.

GIF animation loop of stages 7-9 -
If you want to add more keyframes to the Timeline Animation, you can click on the record button again move the green playhead to your desired location and perform additional actions on the canvas. Please note that in this example, we only modified the position of the 3D object. However, you can modify any of its properties such as rotation, scale, shadow, and mods, among others. Each time you modify a different property value, a new track will be added to the Timeline Animation panel, representing that specific property value.
It's worth noting that the Timeline Animation feature is not limited to a single asset. You can animate all the assets in your scene to create an elaborate animation that can be used as an alert your viewers can trigger in your livestream.
¶ Useful Timeline Animation Tips and Tricks
¶ Move keyframes
Moving keyframes on the timeline is a simple process. You can move any keyframe by selecting it and dragging it to your desired location on the timeline.
¶ Jump to keyframe
You can jump to a keyframe point in the timeline by double-clicking it. This action will automatically move the green playhead line to the location of the selected keyframe.
¶ Add a keyframe on a track
If you want to add a keyframe between two existing keyframes, simply double-click on the desired location on the track. This will create a new keyframe at that point, which you can then adjust as needed.
¶ Delete a keyframe
To delete a keyframe, first, select the keyframe you wish to delete by clicking on it with your mouse. Then, simply press the delete key on your keyboard to remove it.
¶ Delete a timeline track (layer)
To delete an entire track from the timeline, locate the track you want to remove and click on the “-” icon located on that track. This will remove the entire track, including any associated keyframes from the timeline.
¶ Change a keyframe property
To change the property values of a keyframe, right-click on the keyframe and the relevant property window will open.
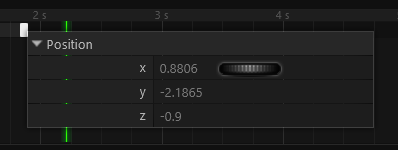
Right-clicking on the position keyframe opens the position property window
¶ Change tween animation between keyframes
When you right-click in the space between two keyframes, the Tween Animation menu will appear. This menu allows you to select the transition animation style between two keyframes. By default, the tween animation is set to "Smooth," but you can select other options such as "Linear," "Quadratic Ease-in," and more.
Please note that Actions, such as emitting objects, applying physics impulses, rolling the dice, etc, will not have a tween between them since they are instantaneous events.
¶ Play/Stop Keyboard Shortcut
If you have the Timeline Animation panel open, you can use the "Space" key on your keyboard to toggle the play button on and off.
¶ Adjust the timeline zoom level
To adjust the zoom level of the timeline simply place your mouse over the timeline and scroll the mouse wheel up or down to zoom in and out, respectively. This feature is particularly useful when working with a long timeline, as it allows you to see everything at once, or when you need to focus on specific keyframes that are close together.
¶ Merged keyframes
When you zoom out, keyframes that are close together will be combined and represented by a longer keyframe icon. When you move a merged keyframe icon along the timeline, it will move all of the keyframes contained within it.

¶ Freehand recording
You can record changes and movements created by your mouse. This method of recording will not only capture your start and end keyframes but will document every single change (and pause) you make during the recording at the relevant timeline location. This is useful and can save time for more complex and detailed movements.
To record a movement you create with the mouse:
- Click the record button on the timeline.
- Next, click the Play button. The green playhead will start moving on the timeline.
- Any changes you make on the canvas during this time will be automatically keyframed on the relevant timeline location. Simply move the objects to create the desired movement.
- When finished, click the record button again to stop the recording.
- Click on the rewind button to move the green playhead to the beginning of the timeline.
- Click the play button to view the animation you recorded.

GIF loop of a freehand recording
¶ Disable a track
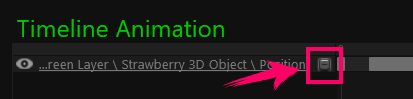
You can disable a track on the timeline by clicking on the eye icon to the left of the track.
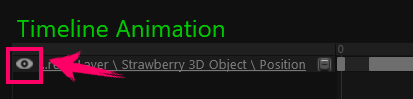
Disabling a track will prevent the associated animation and keyframe data from being displayed on the canvas during playback, but the asset itself will remain visible. For example, if you disable the position animation layer of a 3D object, the object will not move during the animation play, but will still be visible on the canvas. This can be helpful when you need to temporarily disable a particular animation to better focus on other aspects of your project.
¶ Connecting the animation to an alert or a hotkey
Now that we have a Timeline Animation in our Library, we can use any alert (such as a hotkey, an Action Sequence action, or a Twitch channel points redemption alert) to play it. For this example, we will use a hotkey to trigger the animation but the same concept can be applied to any other alert. If you are not familiar with Hotkeys in PolypopLive, please read the Hotkeys article.
-
First, let's add a hotkey
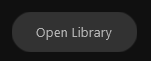
- If it's not already visible, open the Library panel by clicking the "Open Library" button on the bottom left side of the screen.
- Click the "+" button on the bottom right of the Library panel.
- From the menu that appears, select "Hotkey."
-
Now that we have a hotkey in our Library panel, let's connect the hotkey to an Action Sequence
- Select the hotkey item then pull a wire from the hotkey "on Press" alert socket to the socket on the Action Sequence window that appears in the top-center of the screen.
- For a more organized project, you can rename the action sequence by double-clicking its title (recommended).
- If you are not familiar with Action Sequences in PolypopLive, please review the Action Sequences article.
-
Add an action to the action sequence: click the "+" button in the action sequence window and select "Do Action."
-
Pull a wire from the “Do Action” socket in the action sequence, and while dragging the wire, hover over the Timeline Animation item in the Library panel. This will open the Timeline Animation properties.
-
Finally, connect the wire to the “Play” action socket in the Timeline Animation properties.
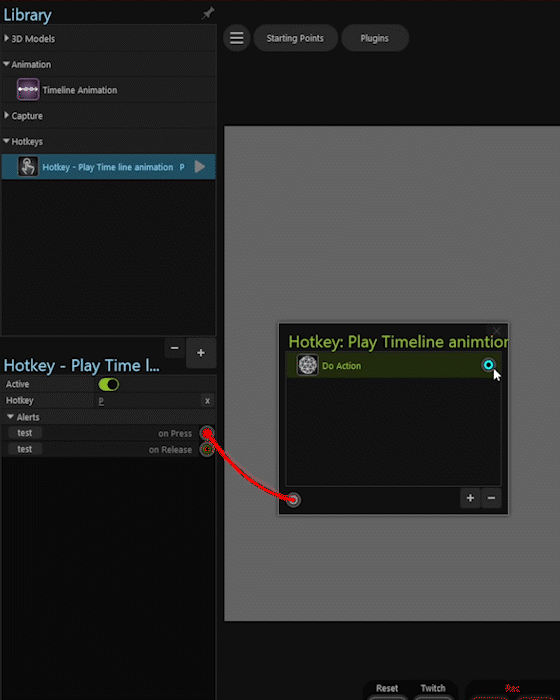
Pulling a wire from the hotkey’s Action Sequence and connecting it to the “Play” action in the Timeline Properties. -
Now, whenever you press the hotkey, the Timeline Animation will be played.